Create your WriteFreely instance without suffering (too much) in the process
This post, rather than being a tutorial, is more a Storytime about what I lived while wanting to mount my own blog in my own equipment instead of renting a VPS.
That said, while I will try to do this from a general point of view, I will still focus on making this process exclusive for Linux, because, in my humble opinion, is more versatile, and more on point with the equipment I chose, besides not consuming as many resources as Windows or Mac. I mean, you could. But I don't really see the point. :P
It's important to clarify that you do require a monetary spending. Assuming you already have your own equipment and a stable internet connection, you'd require to pay for the domain for your server. It would really be the only extra spending required, and I will cover that in further detail in its corresponding section.
And for the purposes of this tutorial-storytime, I'll do the process on another equipment, with an estimated timeframe of five hours. It seems like a lot of time, but it'll be ready on the same day, if you dedicate the time to it.
Contents
- Choosing the equipment
- Preparing the server
- Reverse proxy vs Standalone server: What's more convenient?
- Get your own address for your instance
- Dynamic DNS vs Cloudflare Tunnel
- Let's create the WriteFreely blog!
- Additional web applications
- Final notes
Choosing the equipment
Let's start from two perspectives. The first one is that you have an old computer you don't use very often, but still works, and has a 64 bits processor. You can install a minimalist or web server-oriented operating system like Arch Linux or Ubuntu Server to your computer, that although those are command-line systems, it really is all you need to setup a web server.
And the second one, is that you don't really have an extra equipment you can use, and the one you have is not that viable to use as a server because you use it to play games or you use it for work, or to translate webcomics (guilty of that last one :P). So, you'd need to acquire a new equipment. Although there are options for cheap devices. For example, second-hand or pawn shop computers, or the option I chose, a single board computer, like the Raspberry Pi. I picked the Raspberry Pi 5 4GB of RAM, and a 64GB MicroSD card, although based on my experience, even the Raspberry Pi Zero 2 W would work really well. Besides, you can buy kits on eBay and Amazon.
If you pick a second-hand computer, same thing. Arch or Ubuntu Server and y'all good. And if you pick a Raspberry Pi, you can format the MicroSD card to boot up using Raspberry Pi Imager. Super recommended, because it allows you to install the lite version of Raspberry Pi OS (and other systems) and apply preset configurations, like username and password, WiFi network, and enable SSH access by default.
If you use the Raspberry Pi, to know the IP address it has, you can connect a keyboard and display to your equipment, and run the ifconfig command, which will give you an output similar to this one:
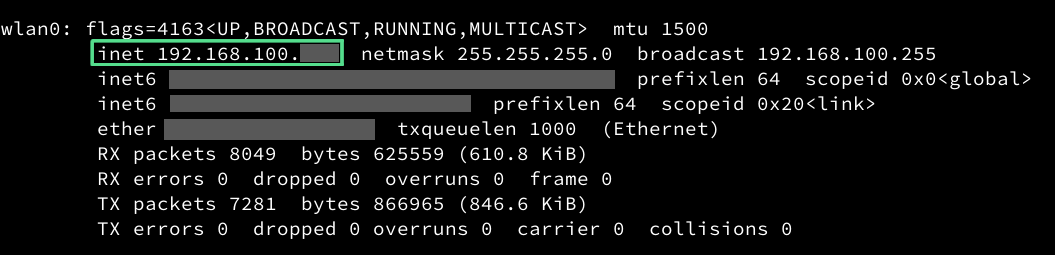
If this is not an option, you can enter the router configuration (usually going to 192.168.100.1 on your browser, but it varies between different routers), and look up for the connected devices, either via Ethernet or WiFi, and you can also locate its address.

With this info, you can connect through any SSH client (even the command line of Windows 10 and 11) using the command ssh [user]@[IP address], to be able to keep setting up your equipment from another place, and even access to the files using SFTP. I'll show Thunar (one of Linux file managers) as an example, which works directly.
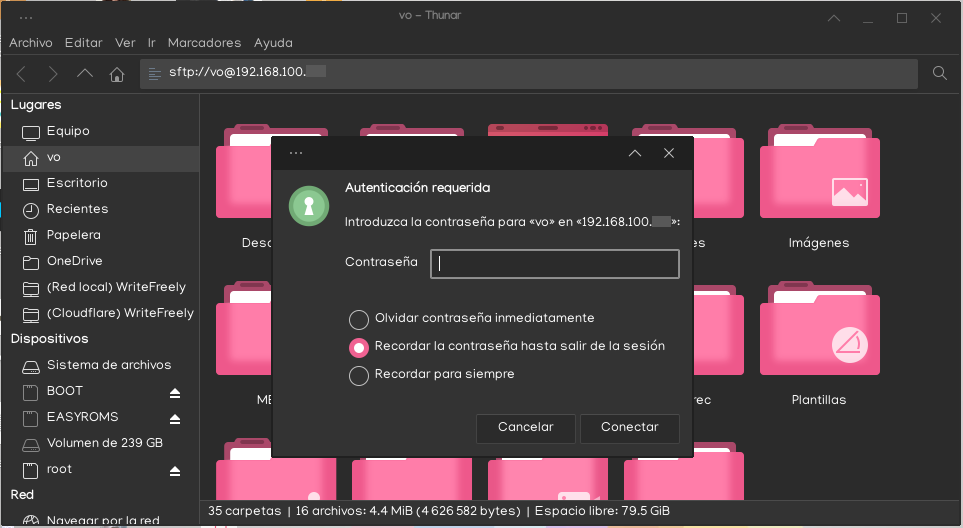
By entering the user and the address, we're asked the password.
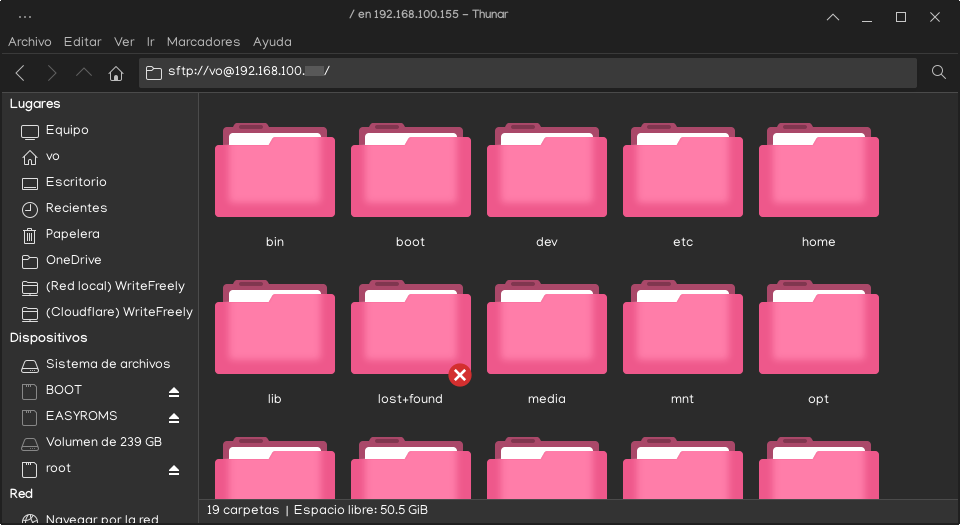
And once inside, we're shown the initial directory of the equipment.
Although, there's not a direct access from the integrated file manager in Windows, on its time I used WinSCP, and it really worked well for me, so I fully recommend it. (No screenshots this time, because I don't use WinSCP anymore... nor Windows xd)
Preparing the server
Once we have the computer ready to interact with it, let's install the web server and database software.
On Arch and derivates (Manjaro, Endeavour, Garuda):
sudo pacman -Syu apache mariadb
On Debian and derivates (Ubuntu, Linux Mint, Raspberry Pi OS, Pop! OS, MX Linux):
sudo apt update
sudo apt upgrade
sudo apt install apache2 mariadb-server
This will only install the programs, but it doesn't help us set up anything as is. Let's get into that.
Apache: The web server per se
Before activating the server, the ideal is that we have a basic test web page just to see if the server works. Copying and pasting this code in a text editor should be more than enough.
<!DOCTYPE html>
<html lang="en">
<head>
    <meta charset="UTF-8">
    <title>Test web page</title>
</head>
<body>
    <p>Website under construction.</p>
</body>
</html>
Remember saving this code in a text file named index.html
The next part is a little bit confusing depending on if we're making this process on systems based on Arch or Debian, because both the configuration files and the web page location will vary on each case. For example, on Arch, the configuration file is located on /etc/httpd/conf/httpd.conf, and you must place the web files (the index.html file, for example) on /srv/http. But in Debian, things change. Here, the configuration files are saved on /etc/apache2/apache2.conf, and the web files are saven on /var/www/html.
Let's copy our HTML file to the web folder in our system, and enable the Apache service to check if it works.
From Arch:
sudo systemctl enable --now httpd
From Debian:
sudo systemctl enable --now apache2
This command starts the service on demand, and also it schedules the automatic start with each system boot (for example, after a reboot for an update), and that's why you only need to introduce this command once.
And to check if it works, let's open the web page http://localhost. It should look like this.
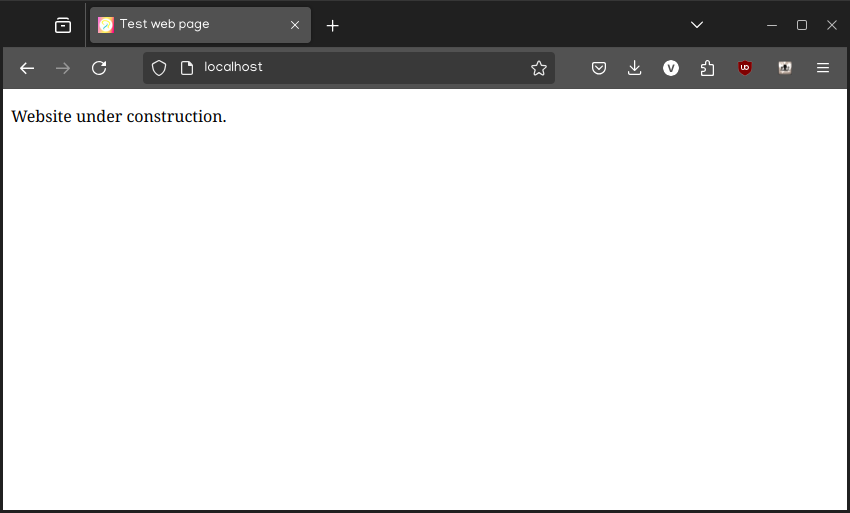
If you see this, congrats! We have begun with this little project. Which is barely the beginning of this journey. Let's configure a little of the things we don't see.
MariaDB: Server stored database
Before enabling the database service, let's run the next command only on Arch.
sudo mariadb-install-db --user=mysql --basedir=/usr --datadir=/var/lib/mysql
Now, we will enable the service. The command is the same for both systems.
sudo systemctl enable --now mariadb
It's also convenient to improve the initial security of MariaDB. Conveniently, we have a command to do that.
sudo mariadb-secure-installation
This command is interactive, and it consists of seven questions. It's really pretty direct and easy to setup, but just in case, let's go in order.
NOTE: RUNNING ALL PARTS OF THIS SCRIPT IS RECOMMENDED FOR ALL MariaDB
      SERVERS IN PRODUCTION USE!  PLEASE READ EACH STEP CAREFULLY!

In order to log into MariaDB to secure it, we'll need the current
password for the root user. If you've just installed MariaDB, and
haven't set the root password yet, you should just press enter here.

Enter current password for root (enter for none):
We're asked the MariaDB root password. We haven't configured it yet, so we'll just press [Enter], and let's go to the next step.
Setting the root password or using the unix_socket ensures that nobody
can log into the MariaDB root user without the proper authorisation.

You already have your root account protected, so you can safely answer 'n'.

Switch to unix_socket authentication [Y/n]
Here we're asked if we want to use Unix Socket authentication or its standard authentication. Honestly, I don't know the implications of that, and besides, the configuration suggests that, so we'll answer no by pressing [n].
You already have your root account protected, so you can safely answer 'n'.

Change the root password? [Y/n]
Here we're suggested to change MariaDB's root password. Tis time, we're gonna answer 'yes', by pressing [Enter].
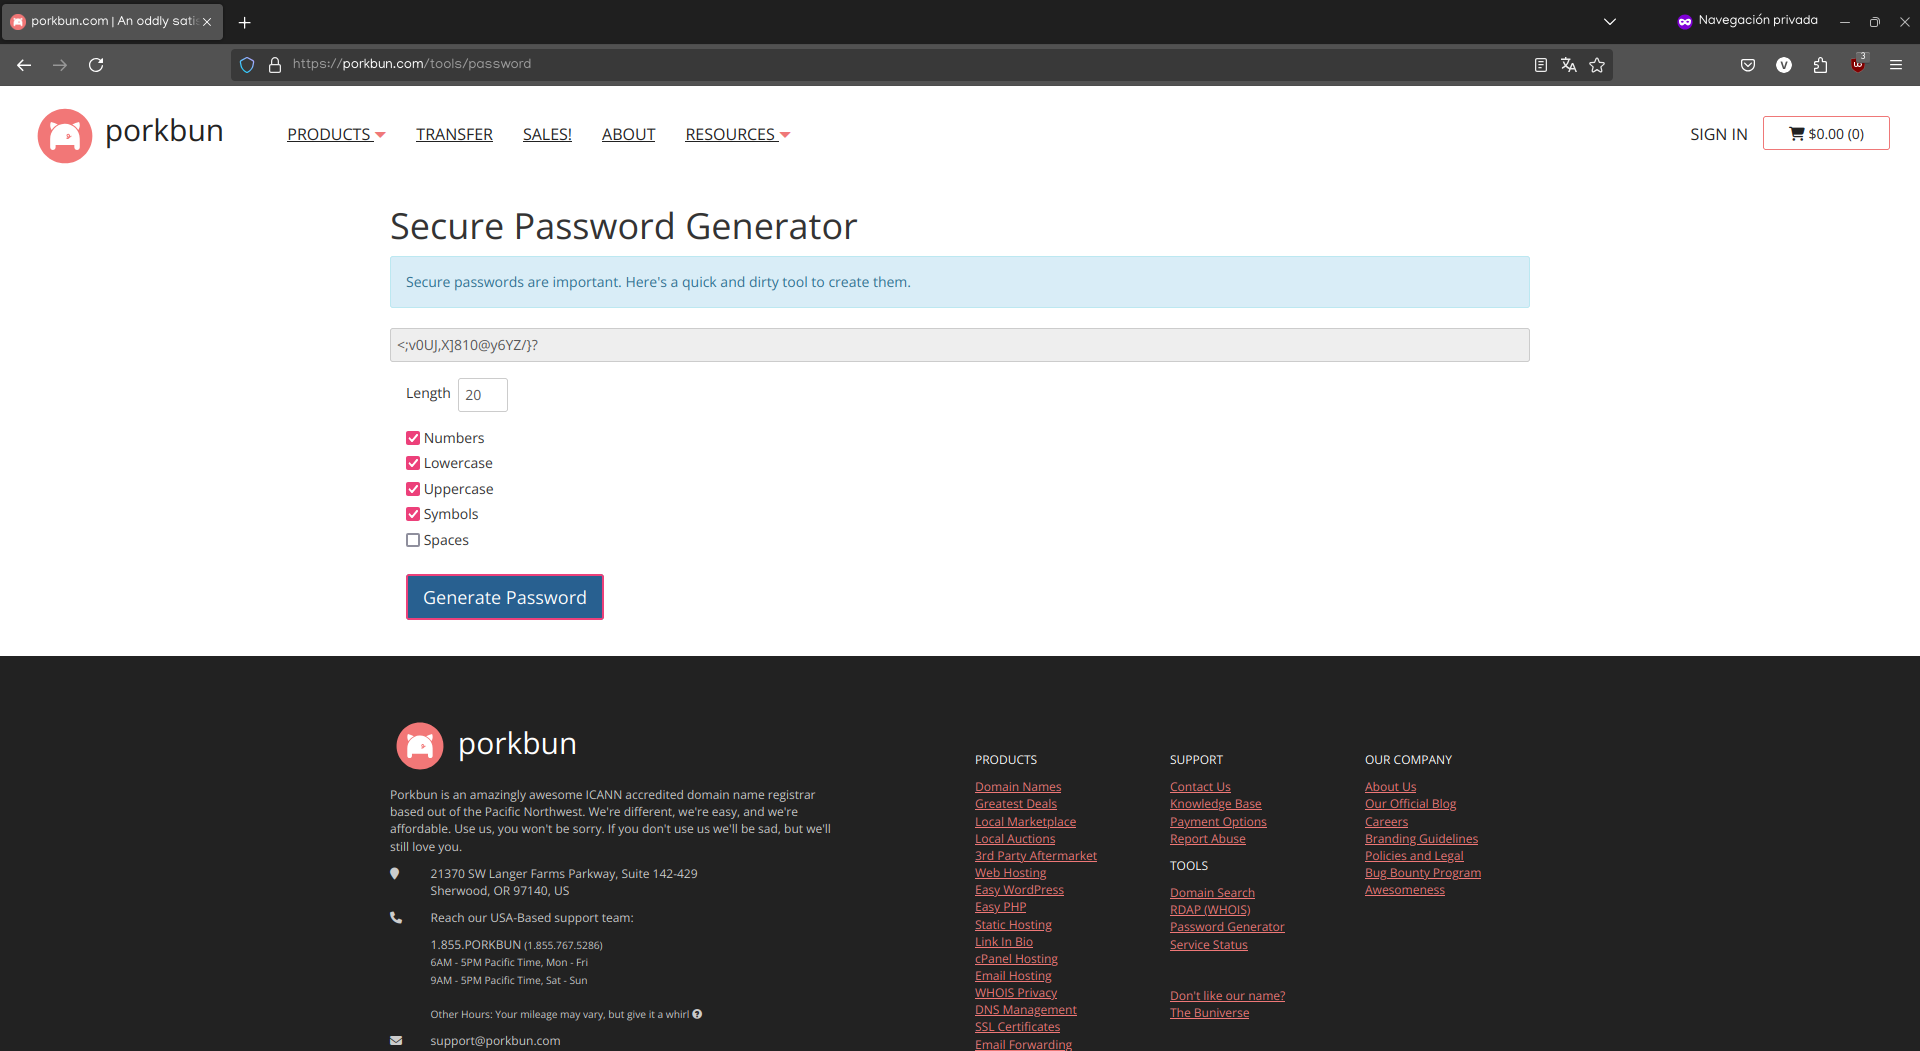
Immediately we're asked to enter a password we want to use, preferably a different one from any other you might use, but it's up to you. Although if I may do a suggestion, I use a password generator to not think too much about it, and still have a good password. Besides, it's so versatile.
Once you have your password (I suggest saving it on a safe place) you must enter it twice on the window we're running the command. Let's go to the next question.
By default, a MariaDB installation has an anonymous user, allowing anyone
to log into MariaDB without having to have a user account created for
them.  This is intended only for testing, and to make the installation
go a bit smoother.  You should remove them before moving into a
production environment.

Remove anonymous users? [Y/n]
here we're asked if we want to remove guest users. For security, we will say yes, by pressing [Enter].
Normally, root should only be allowed to connect from 'localhost'.  This
ensures that someone cannot guess at the root password from the network.

Disallow root login remotely? [Y/n]
Obviously we would want the databases to only be accessible from the server itself. So, we will disable remote access on this question, by pressing [Enter].
By default, MariaDB comes with a database named 'test' that anyone can
access.  This is also intended only for testing, and should be removed
before moving into a production environment.

Remove test database and access to it? [Y/n]
MariaDB has a test database that we won't need in a production environment. So we will delete it by pressing [Enter] again.
Reloading the privilege tables will ensure that all changes made so far
will take effect immediately.

Reload privilege tables now? [Y/n]
Here we simply will reload the database privileges for the changes to be applied immediately, just by pressing [Enter].
And now we have our database clean and ready to continue.
Now, we're gonna get into the MariaDB command line by running sudo mariadb -u root -p. Once you run it, you'll be asked the password we set up a few moments ago. If you did it well, at the end of the command line should appear this indicator, which means we're in.
MariaDB [(none)]>
Once there, let's run these next commands, one by one.
CREATE USER 'writefreely'@'localhost' IDENTIFIED BY '[MariaDB password]';

CREATE DATABASE writefreely CHARACTER SET latin1 COLLATE latin1_swedish_ci;

GRANT ALL PRIVILEGES on writefreely.* to 'writefreely'@'localhost';

FLUSH PRIVILEGES;

exit
The first command creates a specific user for writeFreely on MariaDB, to not interact with it using the root account, which can be dangerous. We also set up the password.
The second one creates the database that WriteFreely will use.
The third command gives permission to the WriteFreely user only to its database, so it won't be able to modify anything else.
The fourth one applies the changes on demand.
And the fifth one closes the MariaDB command line.
For now, we won't cover MariaDB anymore, so let's go to the next part.
Reverse proxy vs Standalone server: What's more convenient?
There are two ways to setup any web server. When it's an only web server, and this one is not too complex, it's recommended to do a standalone server, where that site, and only that site can exist in that server. Which makes the requests to be processed more efficiently, but evidently limits the server scalability, in case you want to host more than one project, like a personal website or even a Mastodon instance. In such cases the reverse proxy is more convenient, where you can host several websites on the same computer, even with different domains, with the disadvantage of the requests to be processed more slowly.
In theory, WriteFreely supports both server types, but as much as I tried, I couldn't make it work on standalone, and I don't want to think too much to make it work like that, so we will do it on reverse proxy.
For that, let's enable the proxy functionality on Apache.
On Arch, it's done by modifying the main configuration file.
sudo nano /etc/httpd/conf/httpd.conf
Search the next lines, one by one, and remove the # symbol at the beginning.
#Include conf/extra/httpd-vhosts.conf

#LoadModule proxy_module modules/mod_proxy.so

#LoadModule proxy_connect_module modules/mod_proxy_connect.so

#LoadModule proxy_http_module modules/mod_proxy_http.so

#LoadModule proxy_fcgi_module modules/mod_proxy_fcgi.so

#LoadModule proxy_wstunnel_module modules/mod_proxy_wstunnel.so

#LoadModule proxy_http2_module modules/mod_proxy_http2.so
Save with [Control] + [S] and exit with [Control] + [X].
And on Debian, it's done by running two commands.
sudo a2enmod proxy
sudo a2enmod proxy_http
After that, let's restart the Apache service.
On Arch:
sudo systemctl restart httpd
On Debian:
sudo systemctl restart apache2
There's one more thing we can do with the reverse prosy, but for that, we'll need the domain, or the web address we will use for our blog, and set up WriteFreely. Let's go with the first one.
Get your own address for your instance
The websites you visit have an address behind a domain name for you to remember it easily. And register a domain name is not always easy. The most accessible way to obtain a domain name is through a site offering the service. Although you can try to get a free domain through Freenom, I personally don't recommend it that much, because your preferred domain might not be available for registration, and you're limited to just a few Top Level Domains (TLD, the ending part of an address, usually .com or .tk). If you don't have an inconvenient on looking up for a free domain, even if it's not the one you have in mind, it might be a good option.
So, following the recommendation someone made to me before, I now recommend Porkbun because it also offers bomains to pretty accessible prices, costing from USD$1 for first year sale, and annual renewal from $USD5, besides offering varied and funny TLD options, like .lol, .wtf, .pizza, among others.
The registration process is going to the login page and fill the registration form on the right.
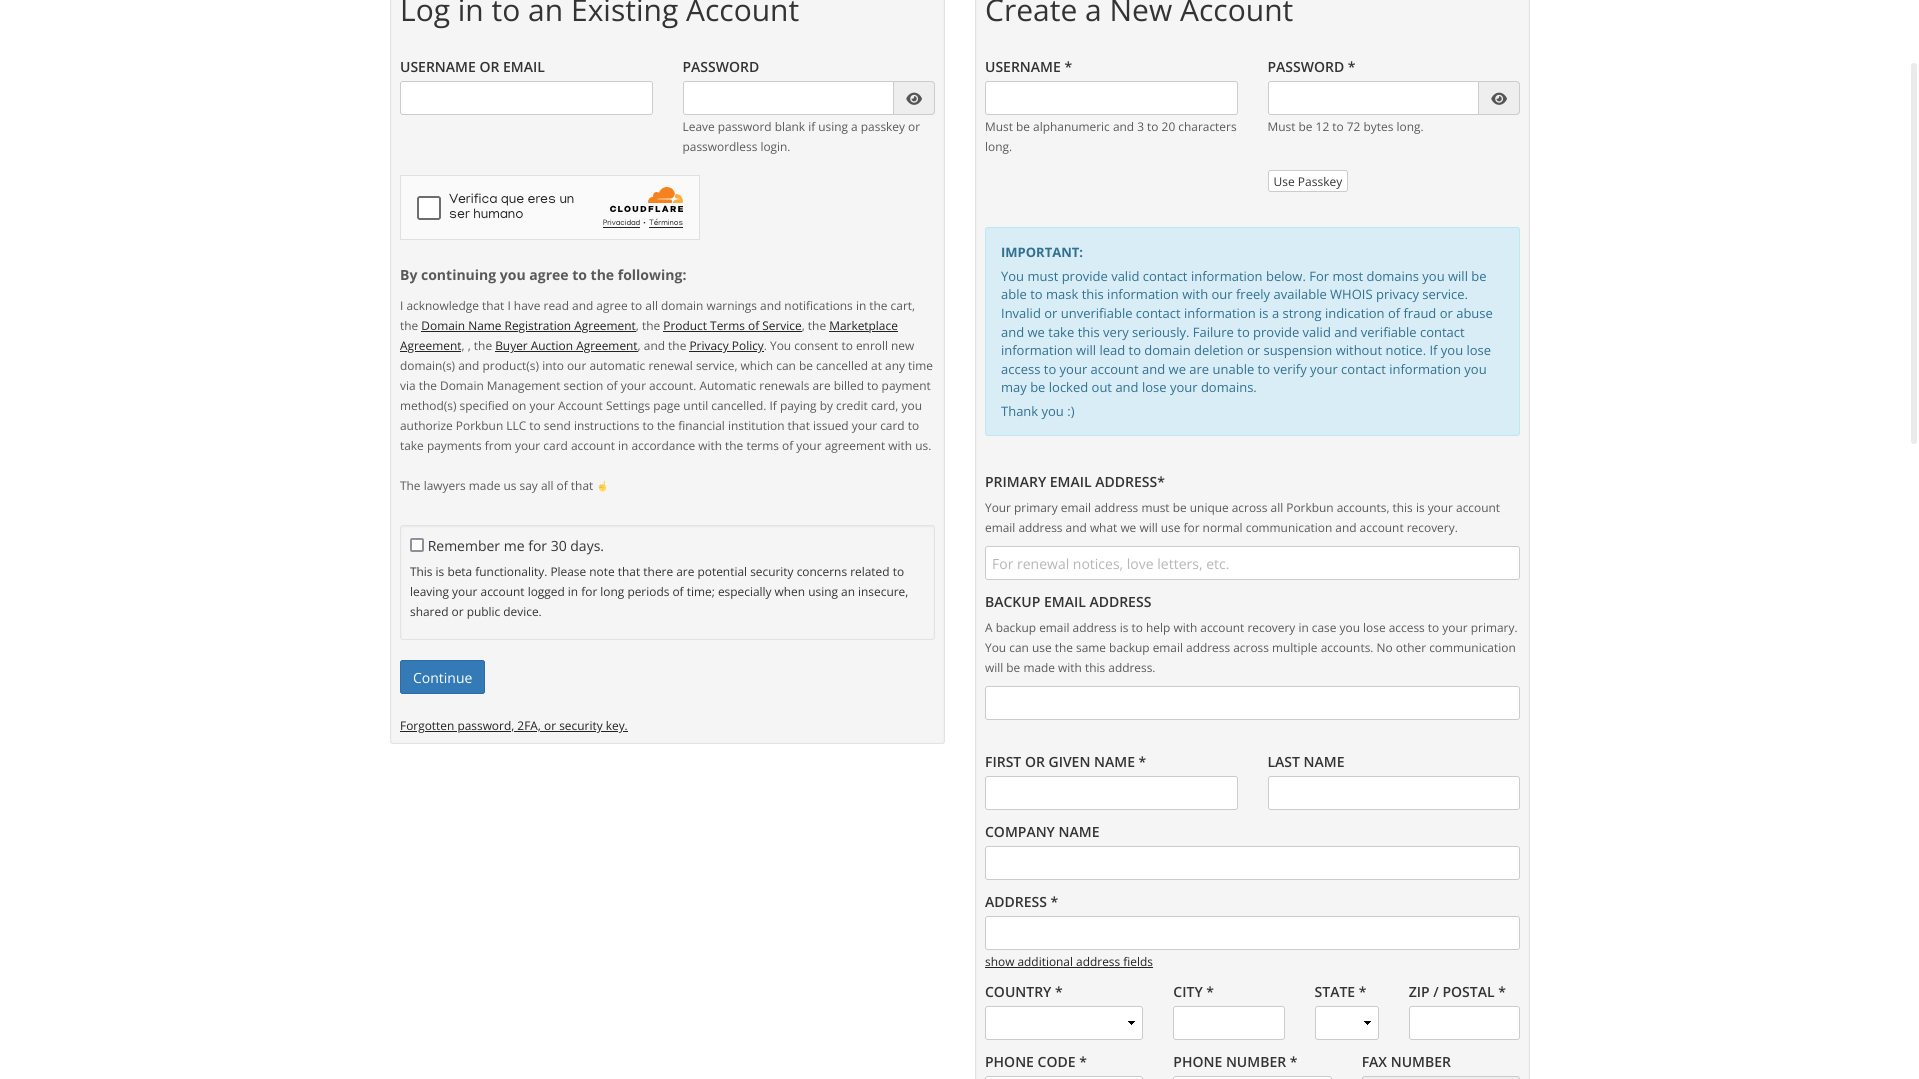
The usual. Username, password (or physical access key), email address, personal information, and accept terms and conditions. By completing the registration, you must validate your account with a code you receive in the email, and once your account is validated, you can look up for domains to purchase. And I will purchase one I want for a personal project I plan to do later, but I still don't want to spill the beans.
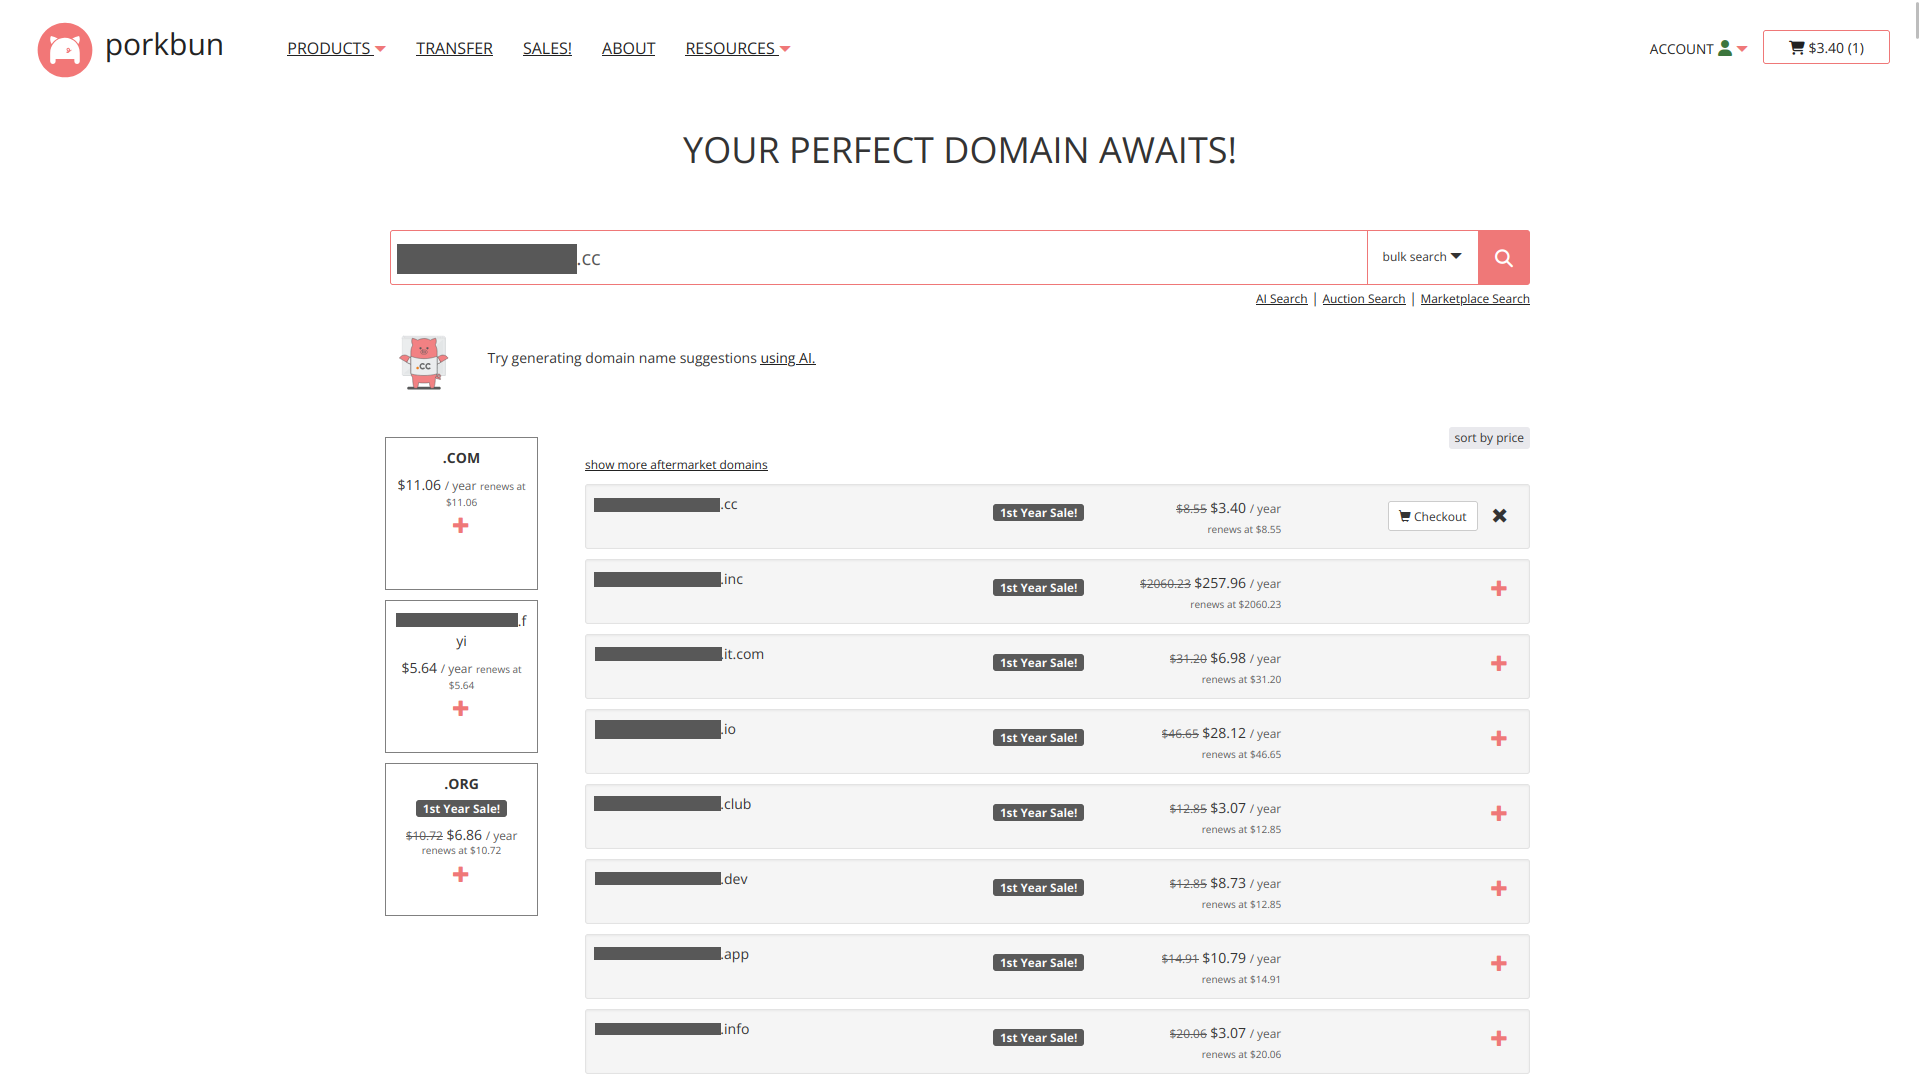
And here we can see several of the available TLDs to choose. For this domain, I chose .cc because it's not expensive, and that project will be more general. But's let not distract from the topic. Once we select our domain, and we add it to the cart, we can proceed to see it.
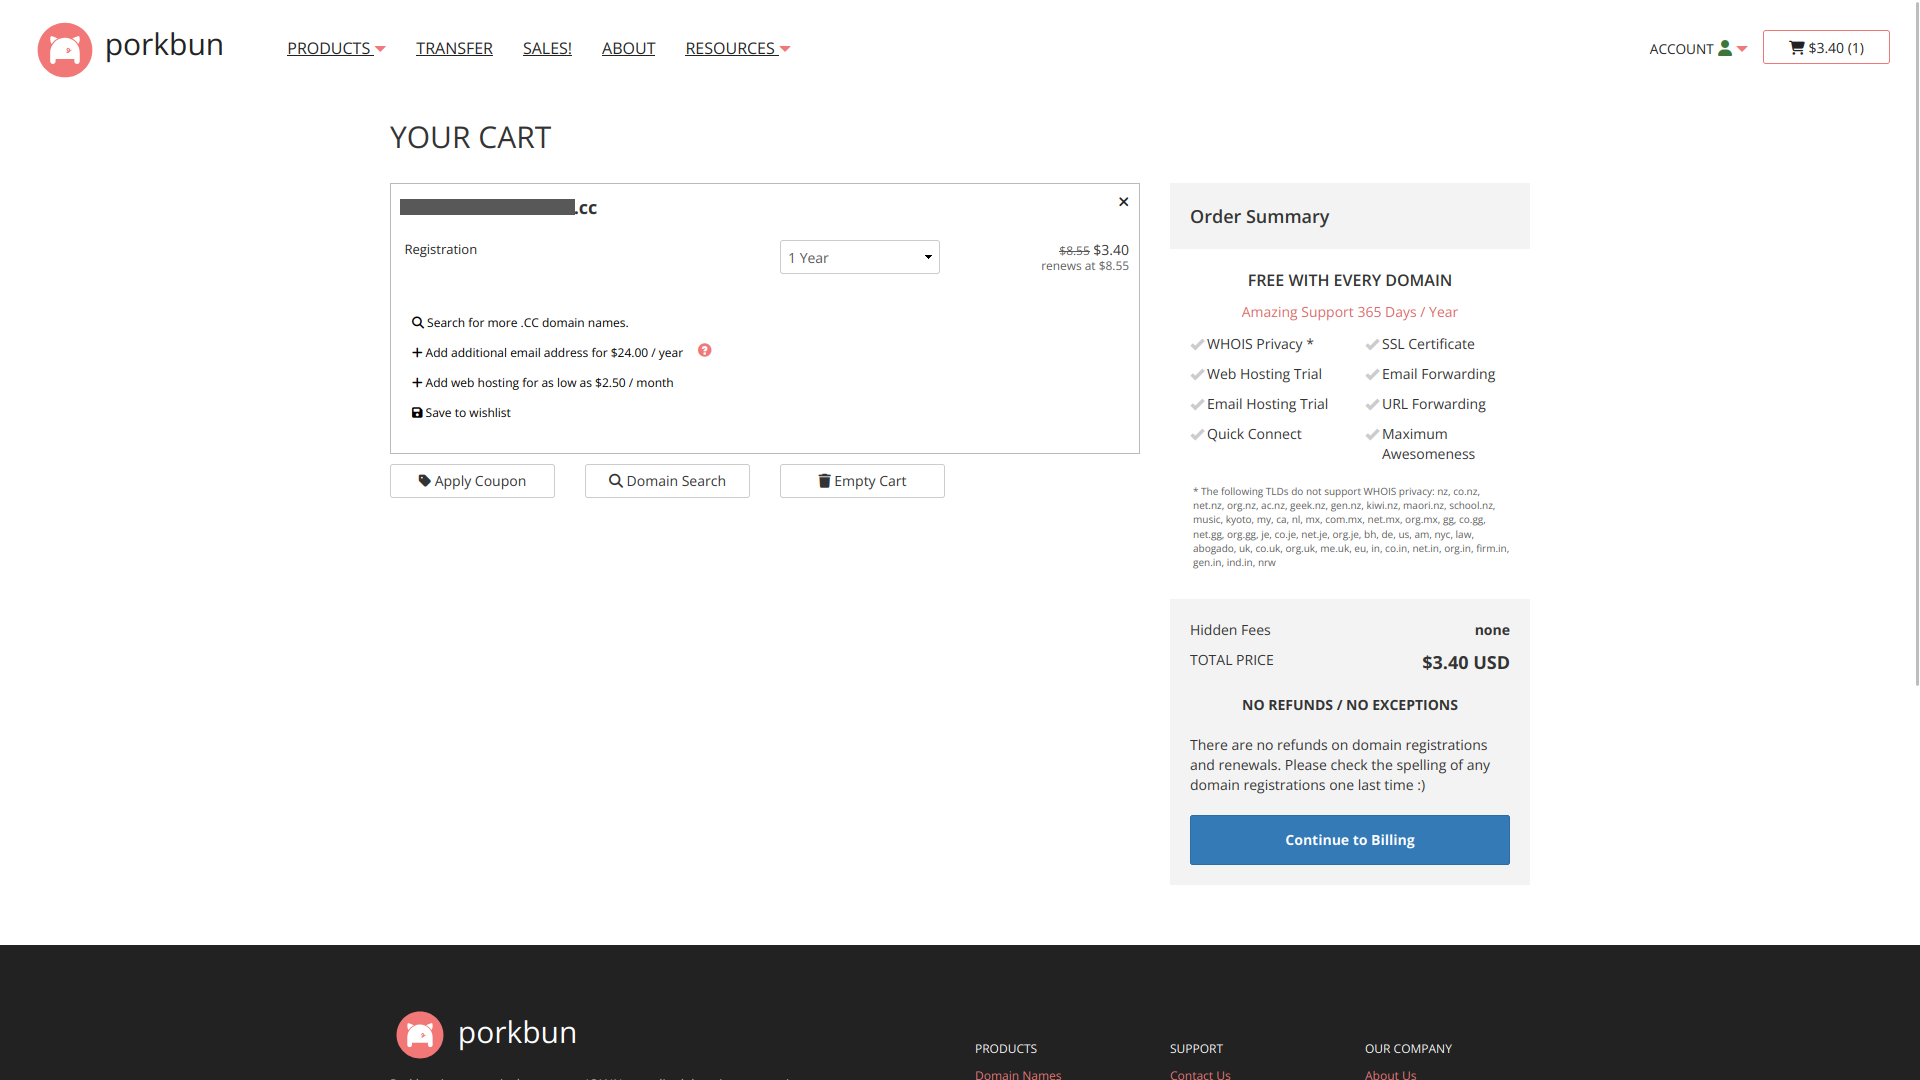
From here, we can select for how many years we want to purchase the domain. For now, we will limit to choose one year, and we will click on the [Continue to Billing] button, to introduce our card information. And once the payment goes through, we can see our domain on our list.
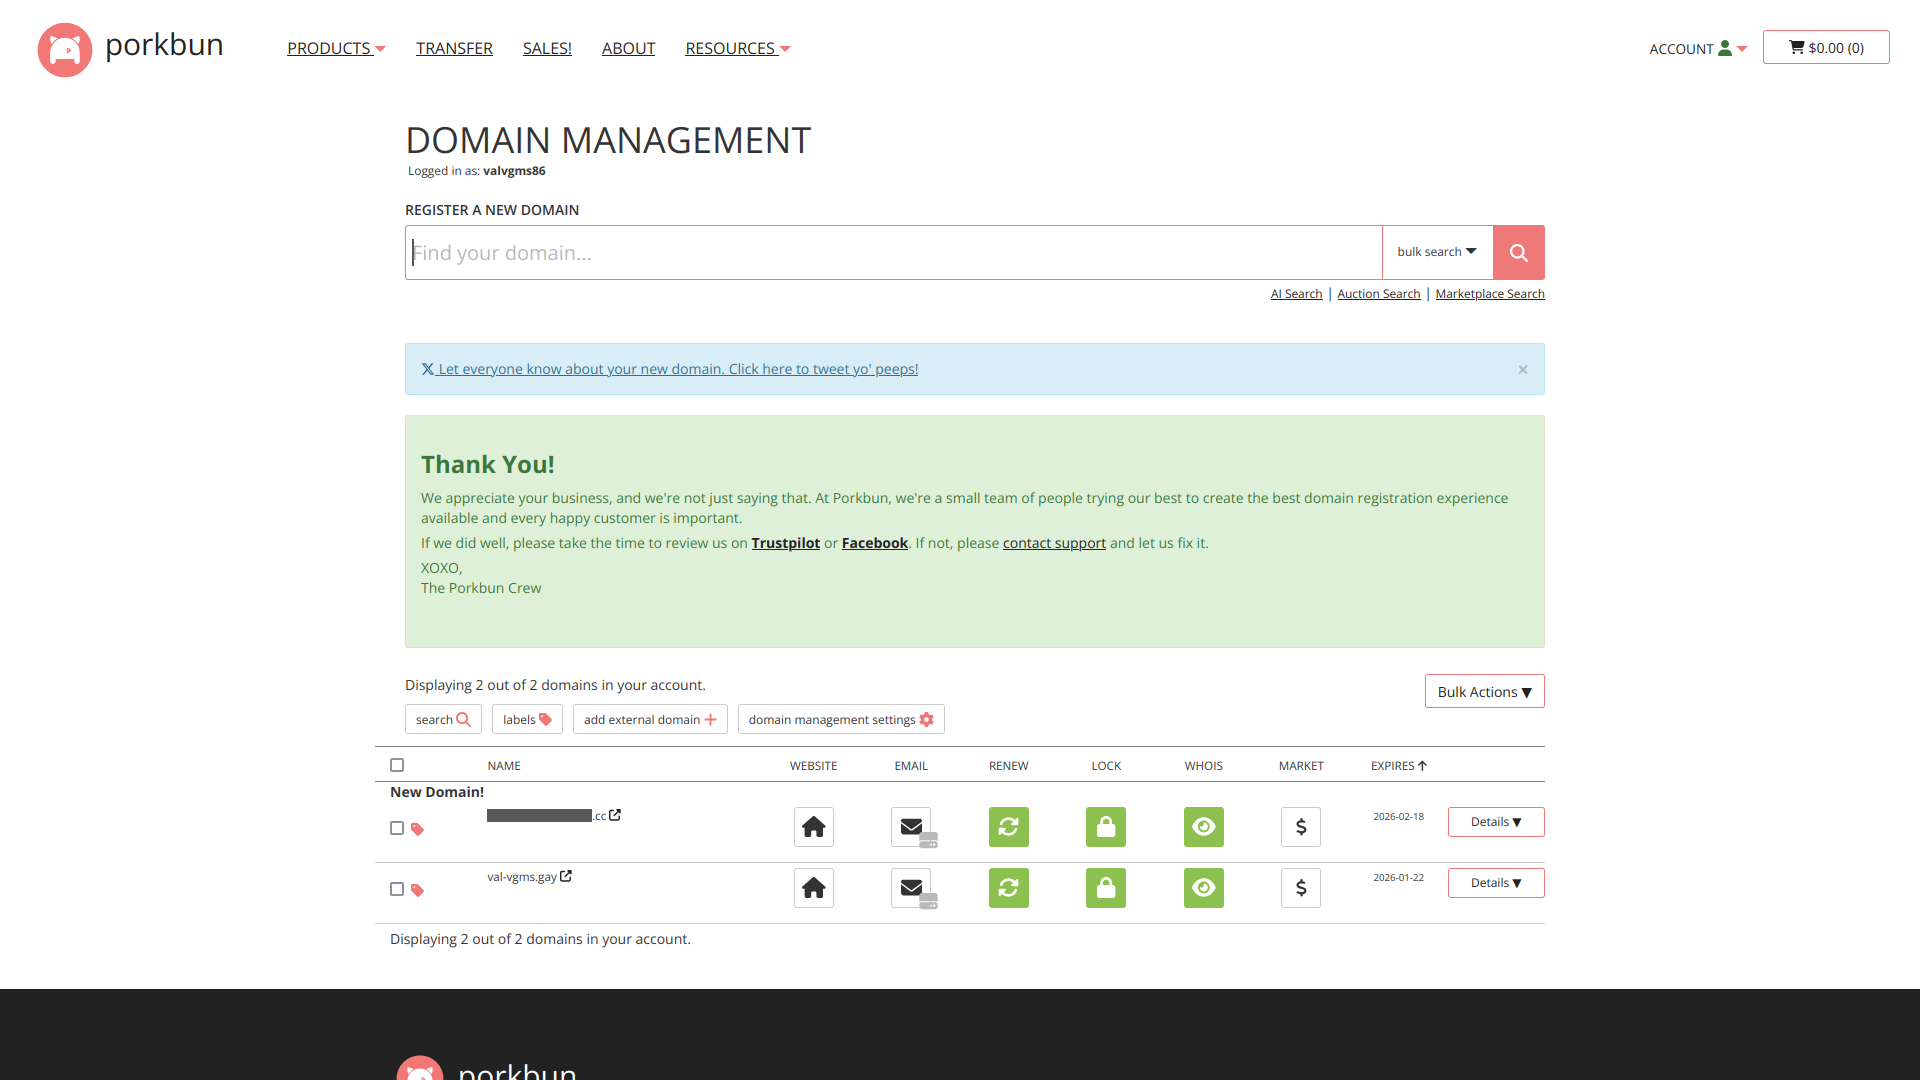
Now that we have our domain, let's make it to point to our equipment.
Dynamic DNS vs Cloudflare Tunnel
There are two ways to make the web address to point to our site. The first one is an old reliable for many people, and it's Dynamic DNS. Where we ask our router or our computer to periodically request the server to make the change automatically, and to always point to the public address of our router. And the second one is one I didn't know about until recently, but it's very interesting, and is Cloudflare Tunnel, which makes more or less the same as Dynamic DNS. The difference between them is that the Dynamic DNS works with your real IP address, which might expose you to attacks really easily, and Cloudflare Tunnel does it by routing your IP address through their infrastructure, which adds an additional protection layer.
Actually, when I just started to mount this, I didn't know Cloudflare Tunnel at all, and I wanted to complete the process only with Dynamic DNS.
I won't lie. I was about to give up on this part, because there are internet providers that make the routers to connect to the internet using subnetworks, which is known as NAT. Basically, an IP address is shared among several devices, which makes Dynamic DNS difficult. And with the tunnel you can skip all those network restrictions, and also the Cloudflare infrastructure can help a little.
A very dear friend suggested me to try with Cloudflare Tunnel, and he even sent me a tutorial. And as it was really useful for me, but it's not very detailed, I'll put it here, going into greater detail.
Registration on Cloudflare for Teams
All you must do here is go to the registration page, put your email and password, and verify your email. Once you do all that, you'll be presented with the screen to add the domain we just purchased.
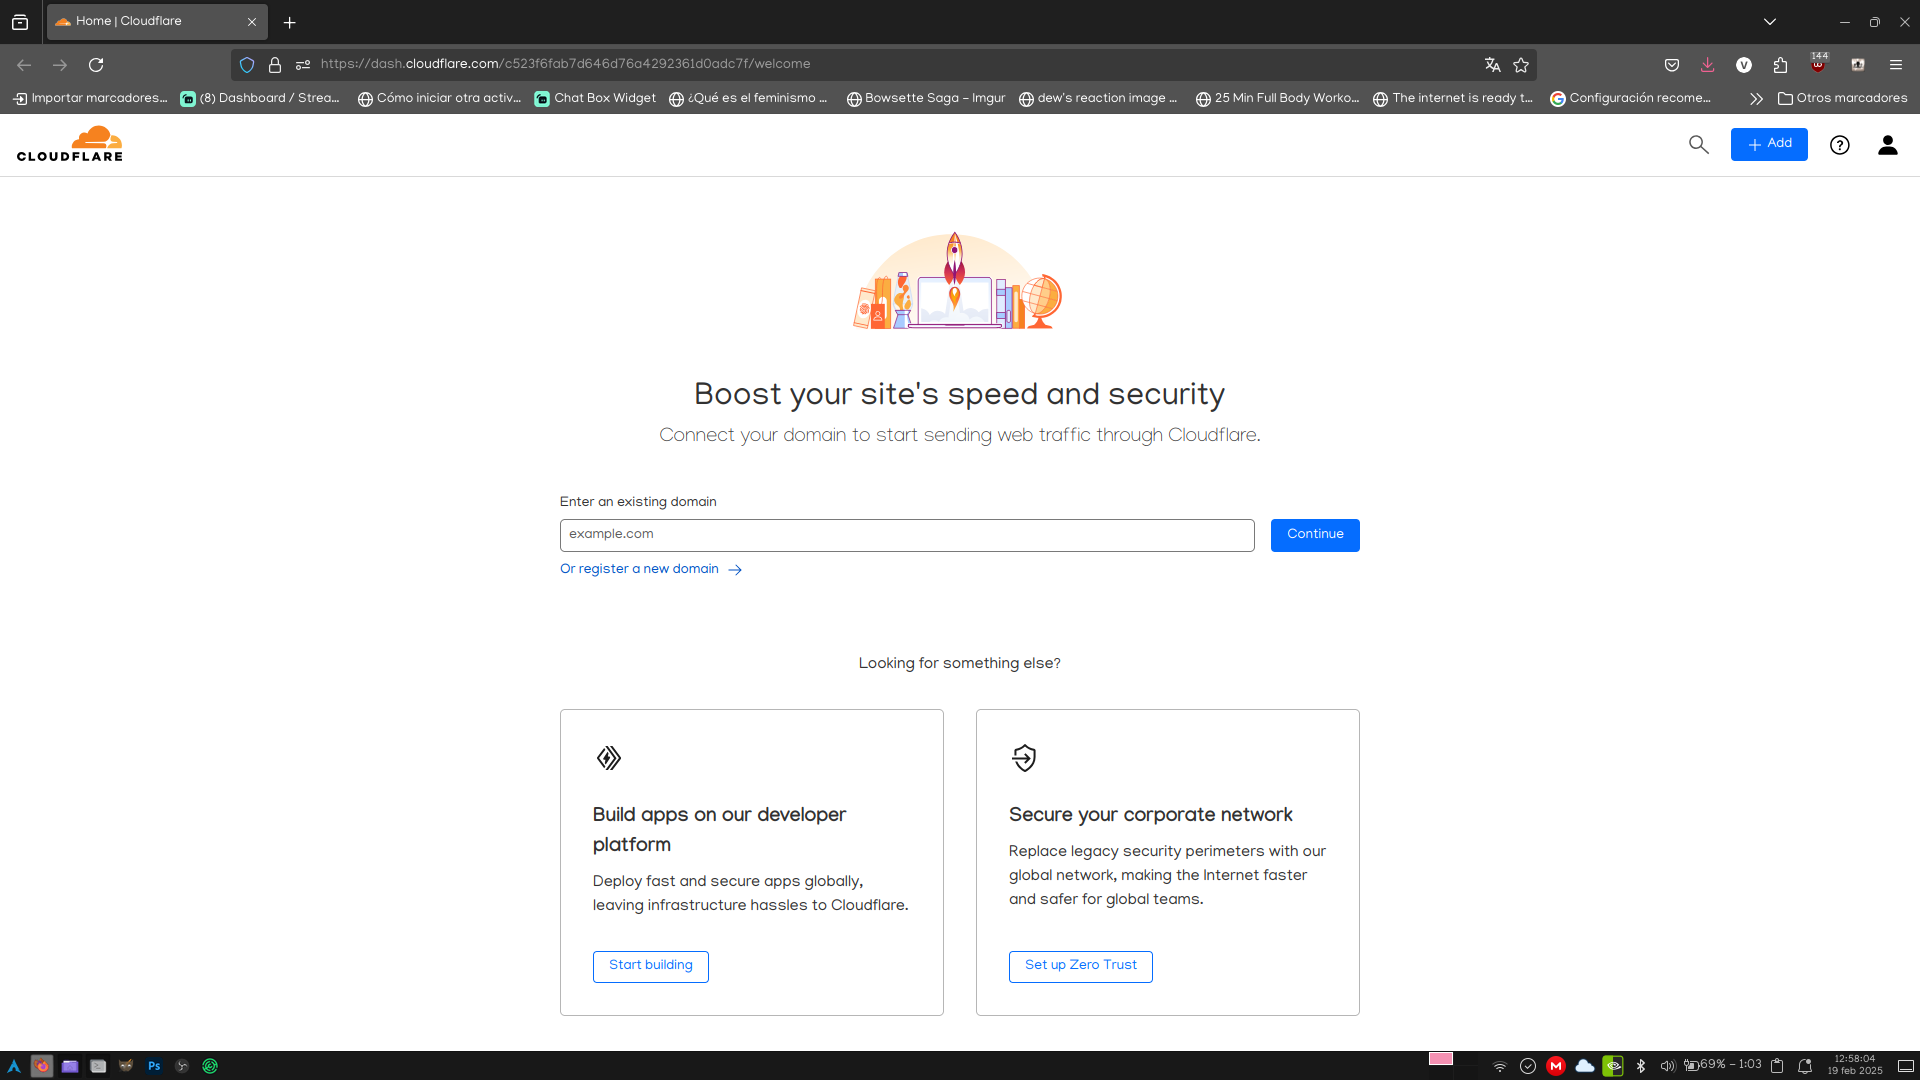
Once we put the domain, and press the Continue button, we'll go to the configuration assistant.
Con la primera opción seleccionada y presionando en Continuar, avanzamos a la siguiente pantalla.
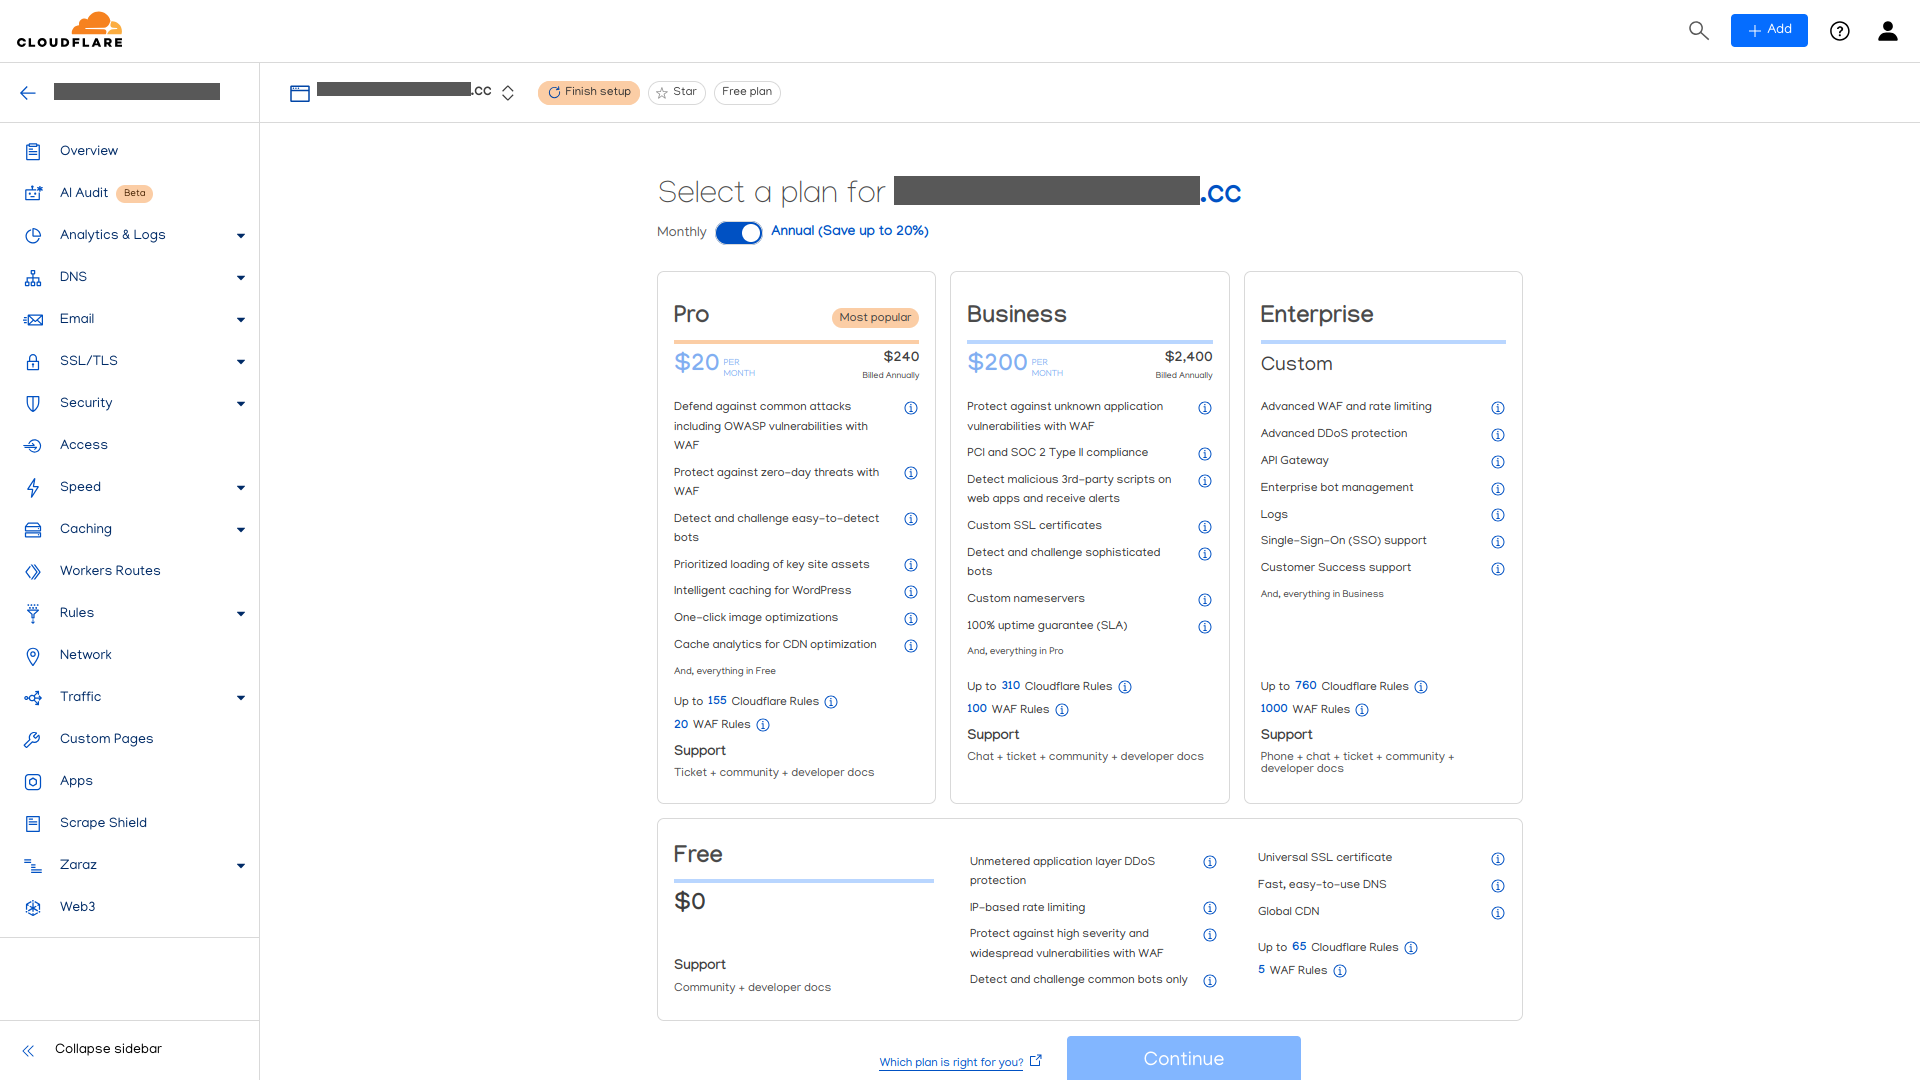
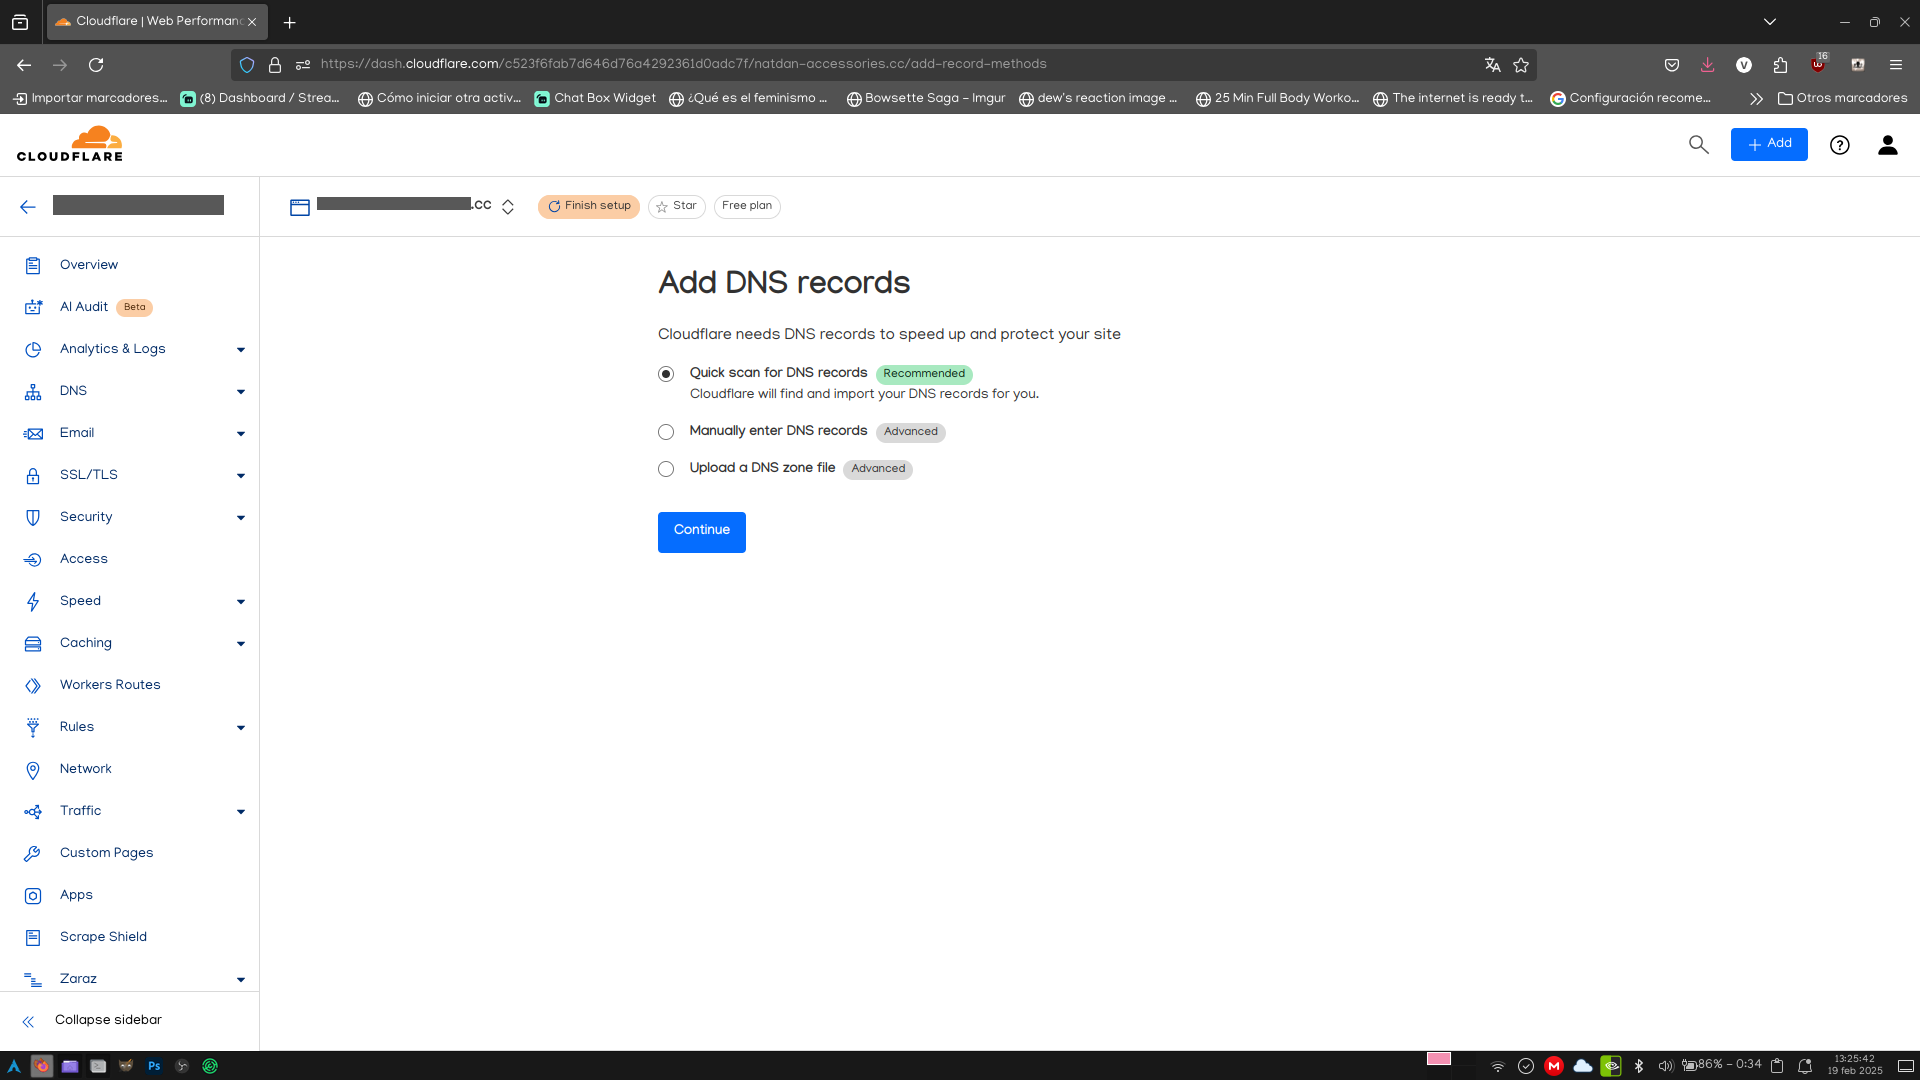
Here we are presented with several plans to select. We don't want to spend another cent, so we'll choose the free one. And by pressing the Continue button, we'll go to the next screen to set up the DNS records

As we will do this process later, we'll click on Continue to activation, and then the Confirm button. We'll go to the Nameserver configuration guide.
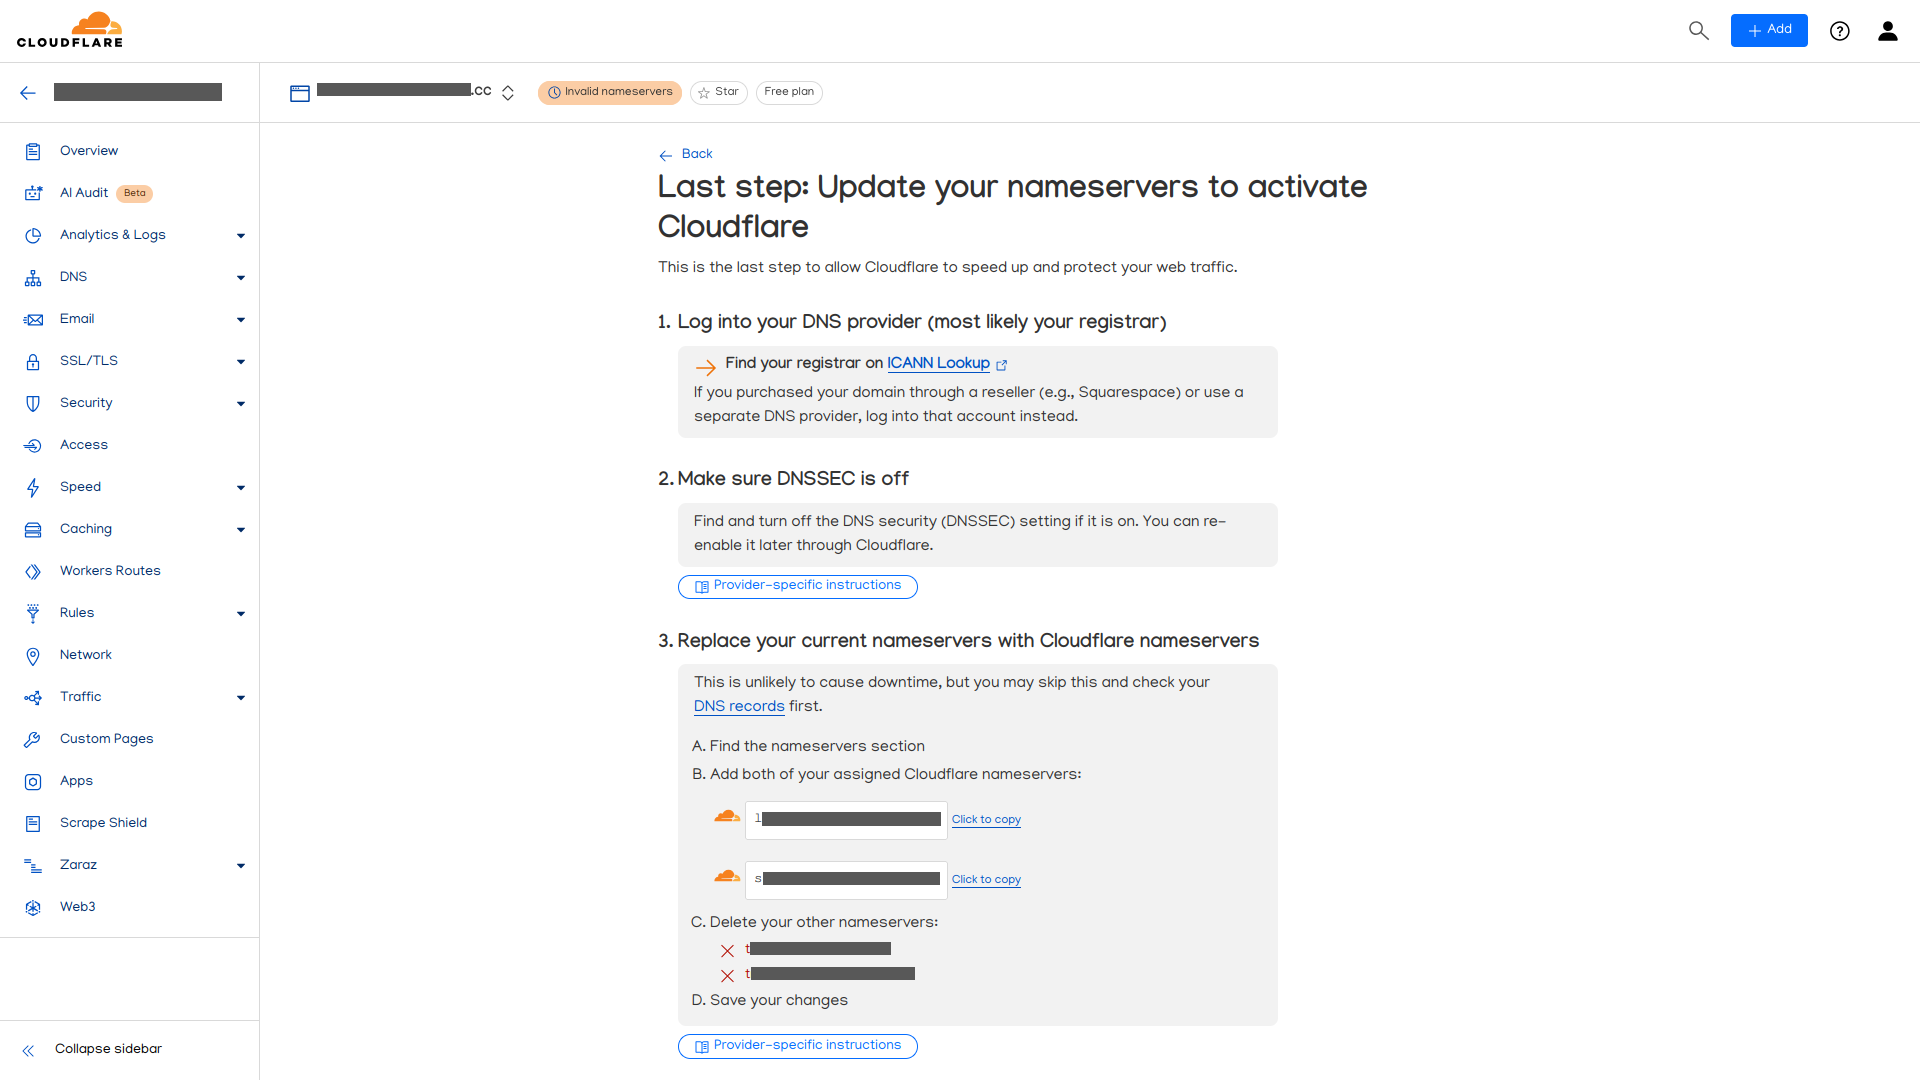
Let's follow these instructions. The first point is already covered by logging into Porkbun, so we just have to go to the domain control page on your Porkbun account.
The second point is also covered by default, expanding our domain details, and seeing the Registry DNSSEC section at zero.
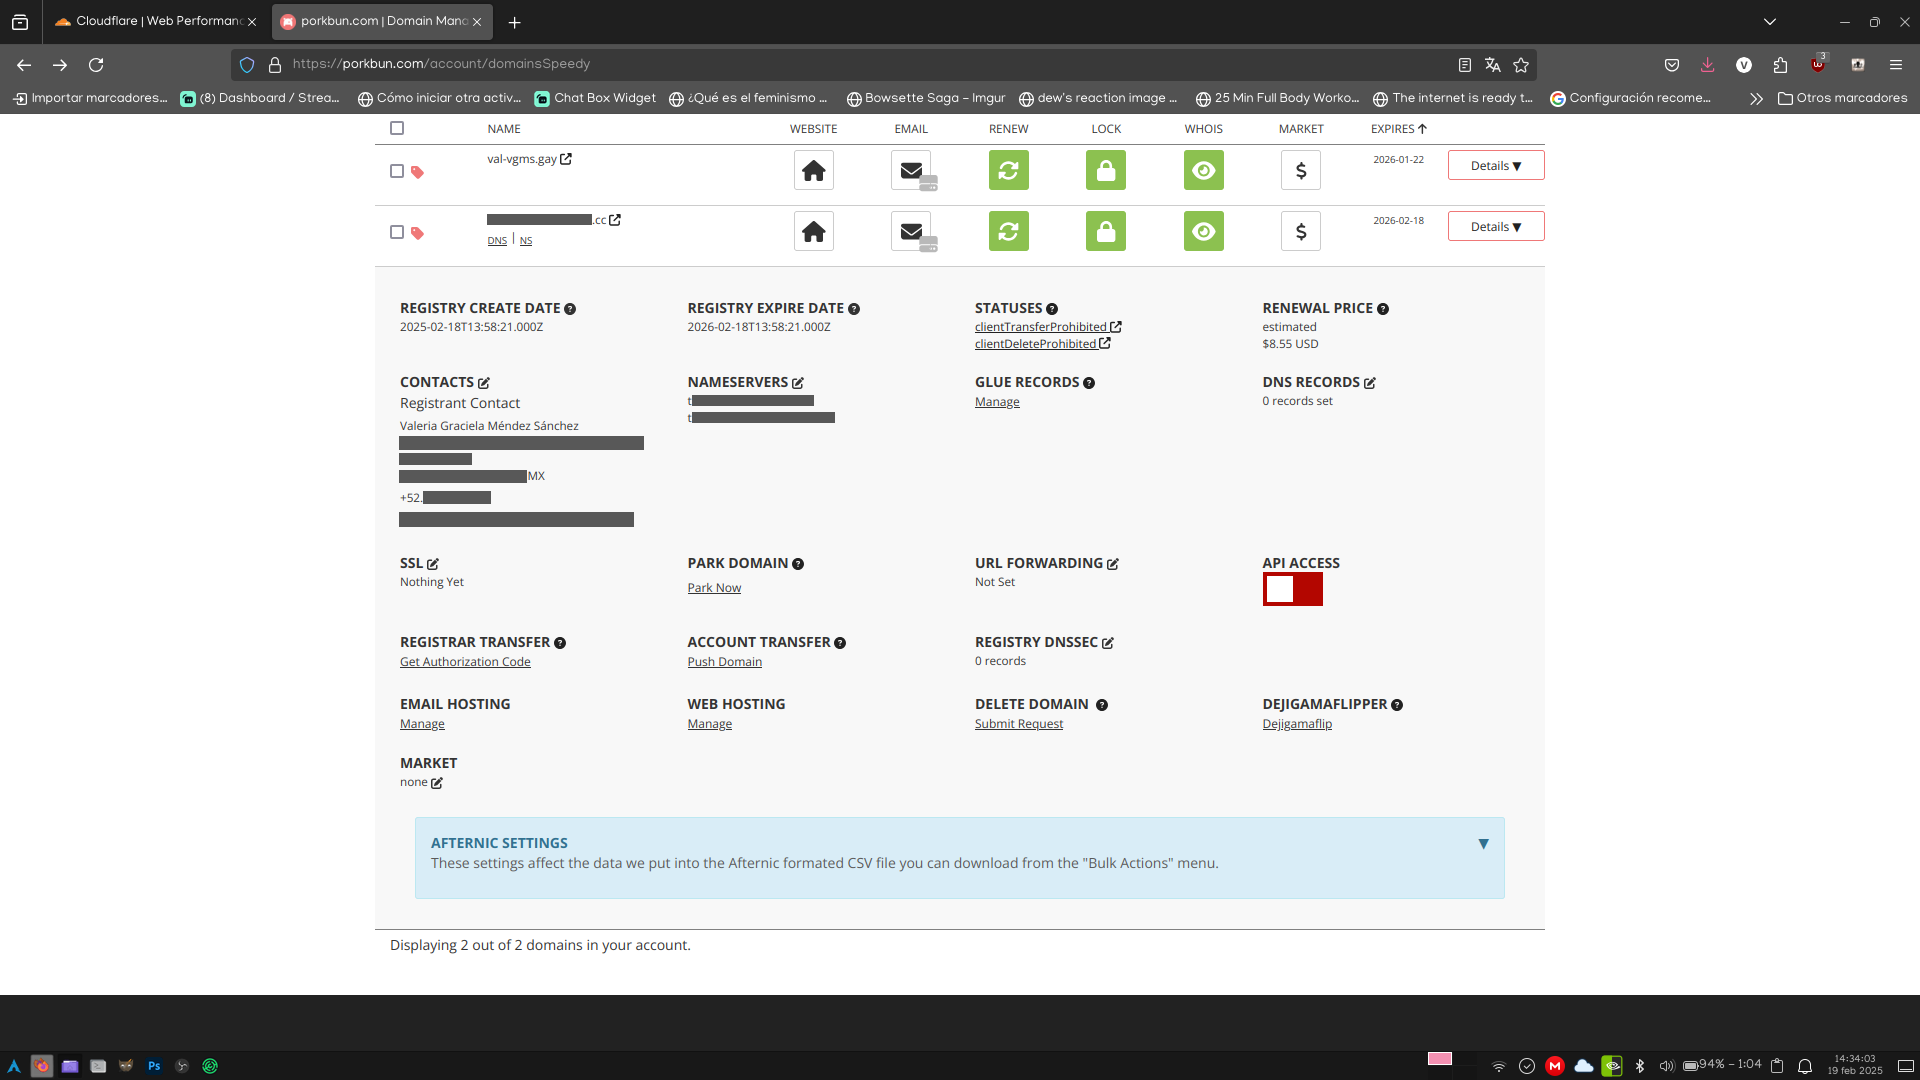
And we're going to cover the third point by pressing the edit button located next to the Nameservers section, and at the pop-up window, we put on separated lines the servers shown on Cloudflare.
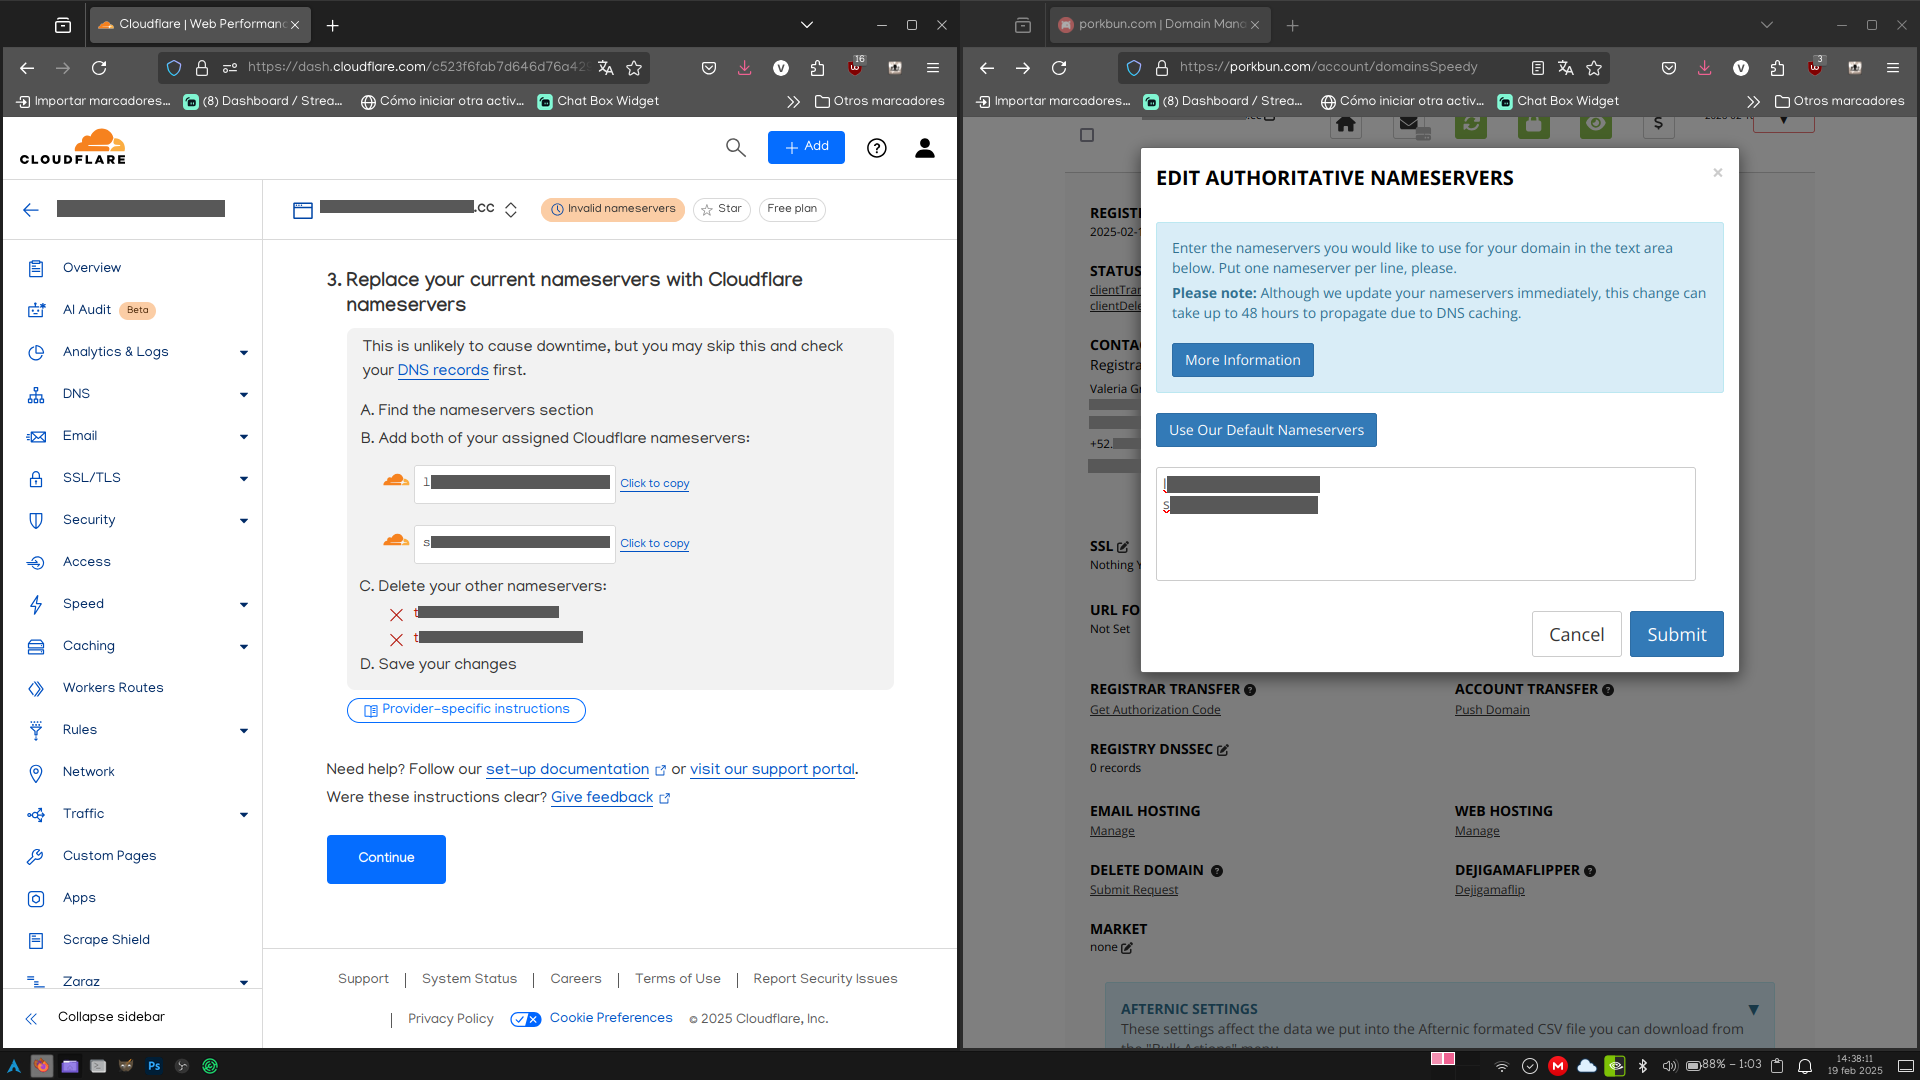
By pressing the Continue button. it says that the servers will be ready within the next 24 hours, but refreshing the page after five minutes, it shows it's all done.
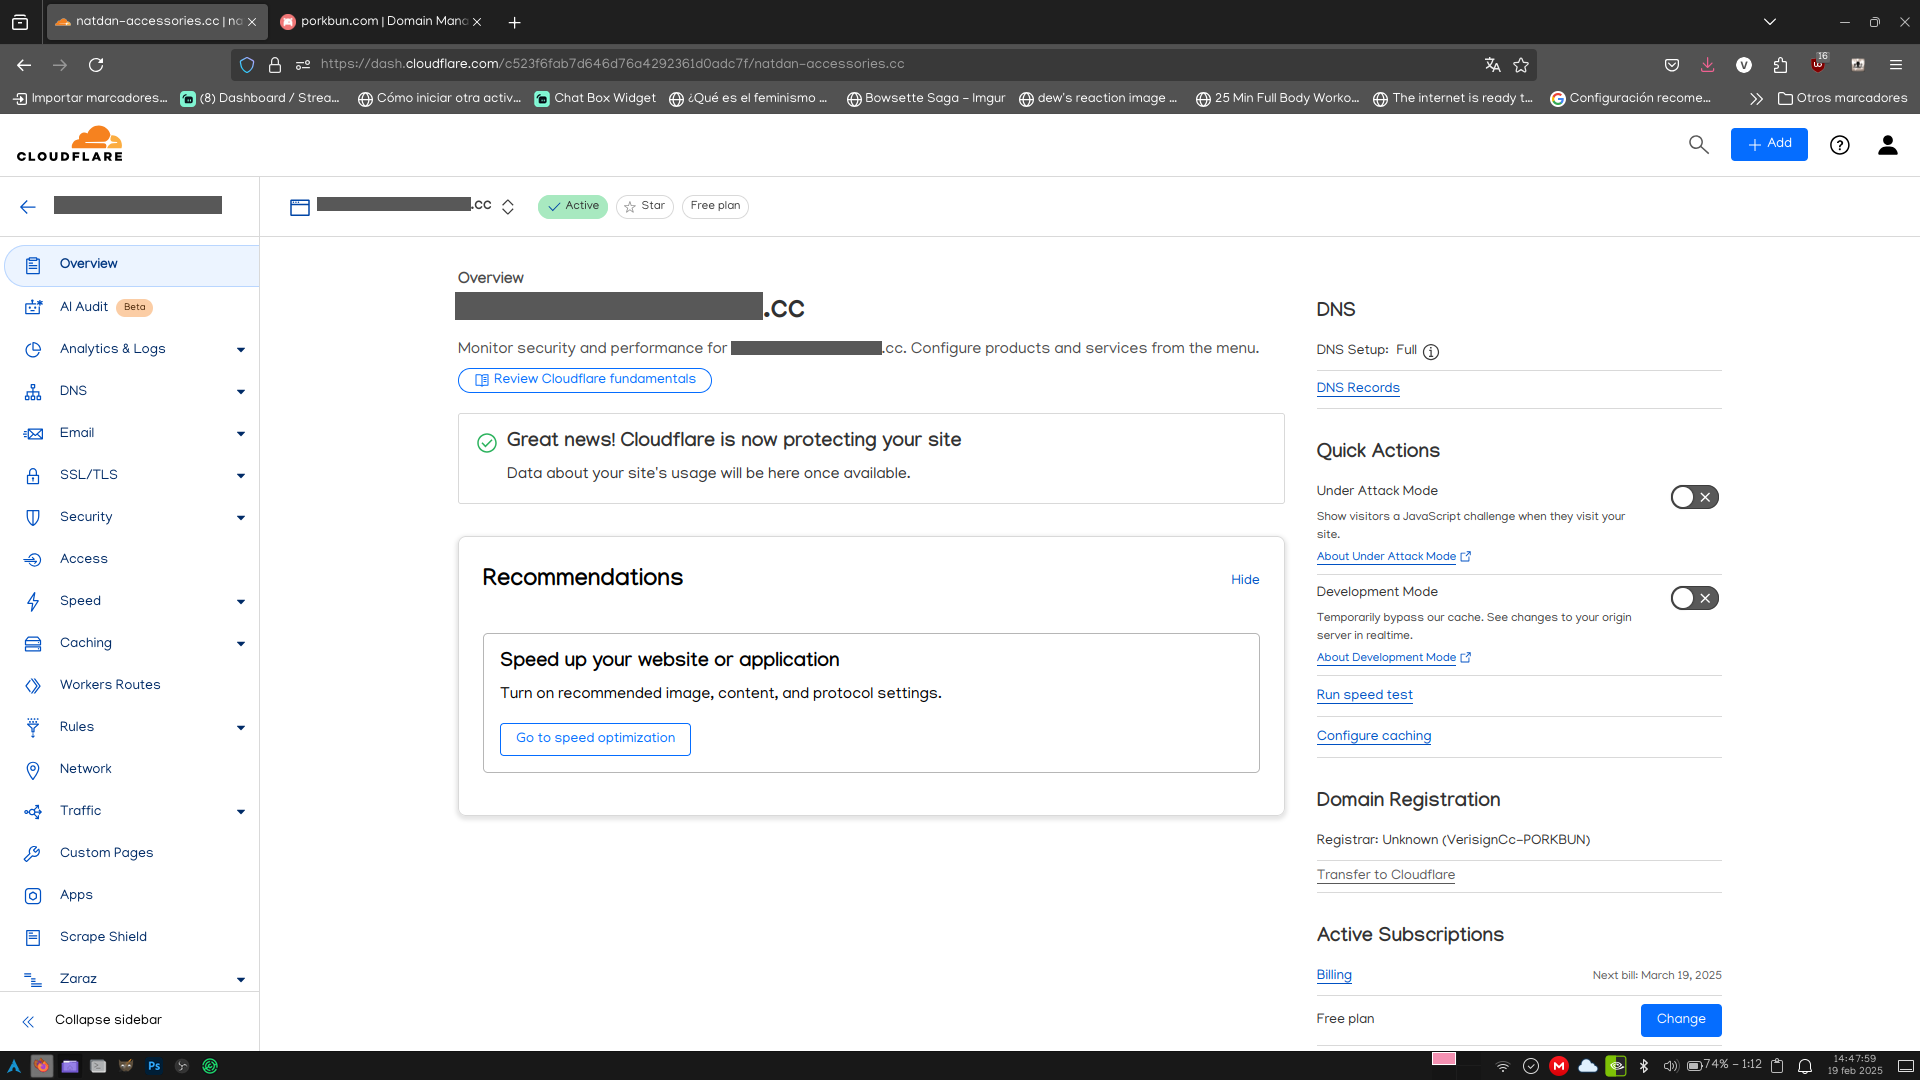
With the servers ready, and even while they're getting ready, we can proceed with the next step.
Install and configure Cloudflared
Before proceeding with the Cloudflare service installation, we must know what type of architecture our system has. On any Linux system you can do that by running the uname -a command. I'll leave a screenshot with the output of this command on my daily use computer (and the one that will be the test instance), and from my Raspberry Pi (the one for this blog).
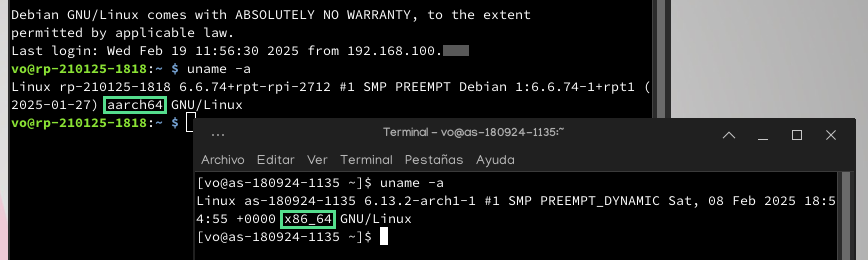
Depending on that last part (highlighted on my screenshot above), is the version we're going to install. If the output of uname contains x86_64, and you're on Arch (or derivates), you got it easy. You can install it with the next command:
sudo pacman -Syu cloudflared
For other configurations, things get complicated. First, it's worth mentioning that, for some reason, the output results of uname and the software version we will download will differ a little. So I'll leave this table with the equivalencies.
| Results of uname | Architecture |
|---|---|
| x86_64 | amd64 |
| x86 | 386 |
| arm7l | armhf |
| aarch64 | arm64 |
Based on this, to install it on Debian (and other Linux systems), we're going to run these commands:
sudo wget -O cloudflared https://github.com/cloudflare/cloudflared/releases/latest/download/cloudflared-linux-{architecture}
sudo mv cloudflared /usr/local/bin
sudo chmod +x /usr/local/bin/cloudflared
It's worth noting that, with this, the way you update Cloudflared (by the way, updates come out at least once a month) will vary, depending on if you install on Arch x86_64 or not. If yes, you just need to run the command to update the whole system.
sudo pacman -Syu
But for everyone else, the command changes a little, by not being tied to the system package manager
cloudflared update
Now that the service is installed, let's configure the tunnel to, finally, making it to pint to our equipment.
Create and setup access tunnel
First, let's create the tunnel, logging in from cloudflared.
cloudflared login
And on the command line, we should get something like this:
A browser window should have opened at the following URL:

https://dash.cloudflare.com/argotunnel?aud=[Private access ID I won't share for security xd]

If the browser failed to open, please visit the URL above directly in your browser.
And it's also possible that a browser opened directly on that address. But in case it didn't open for some reason, copy and paste it on your browser. Which should open something like this.
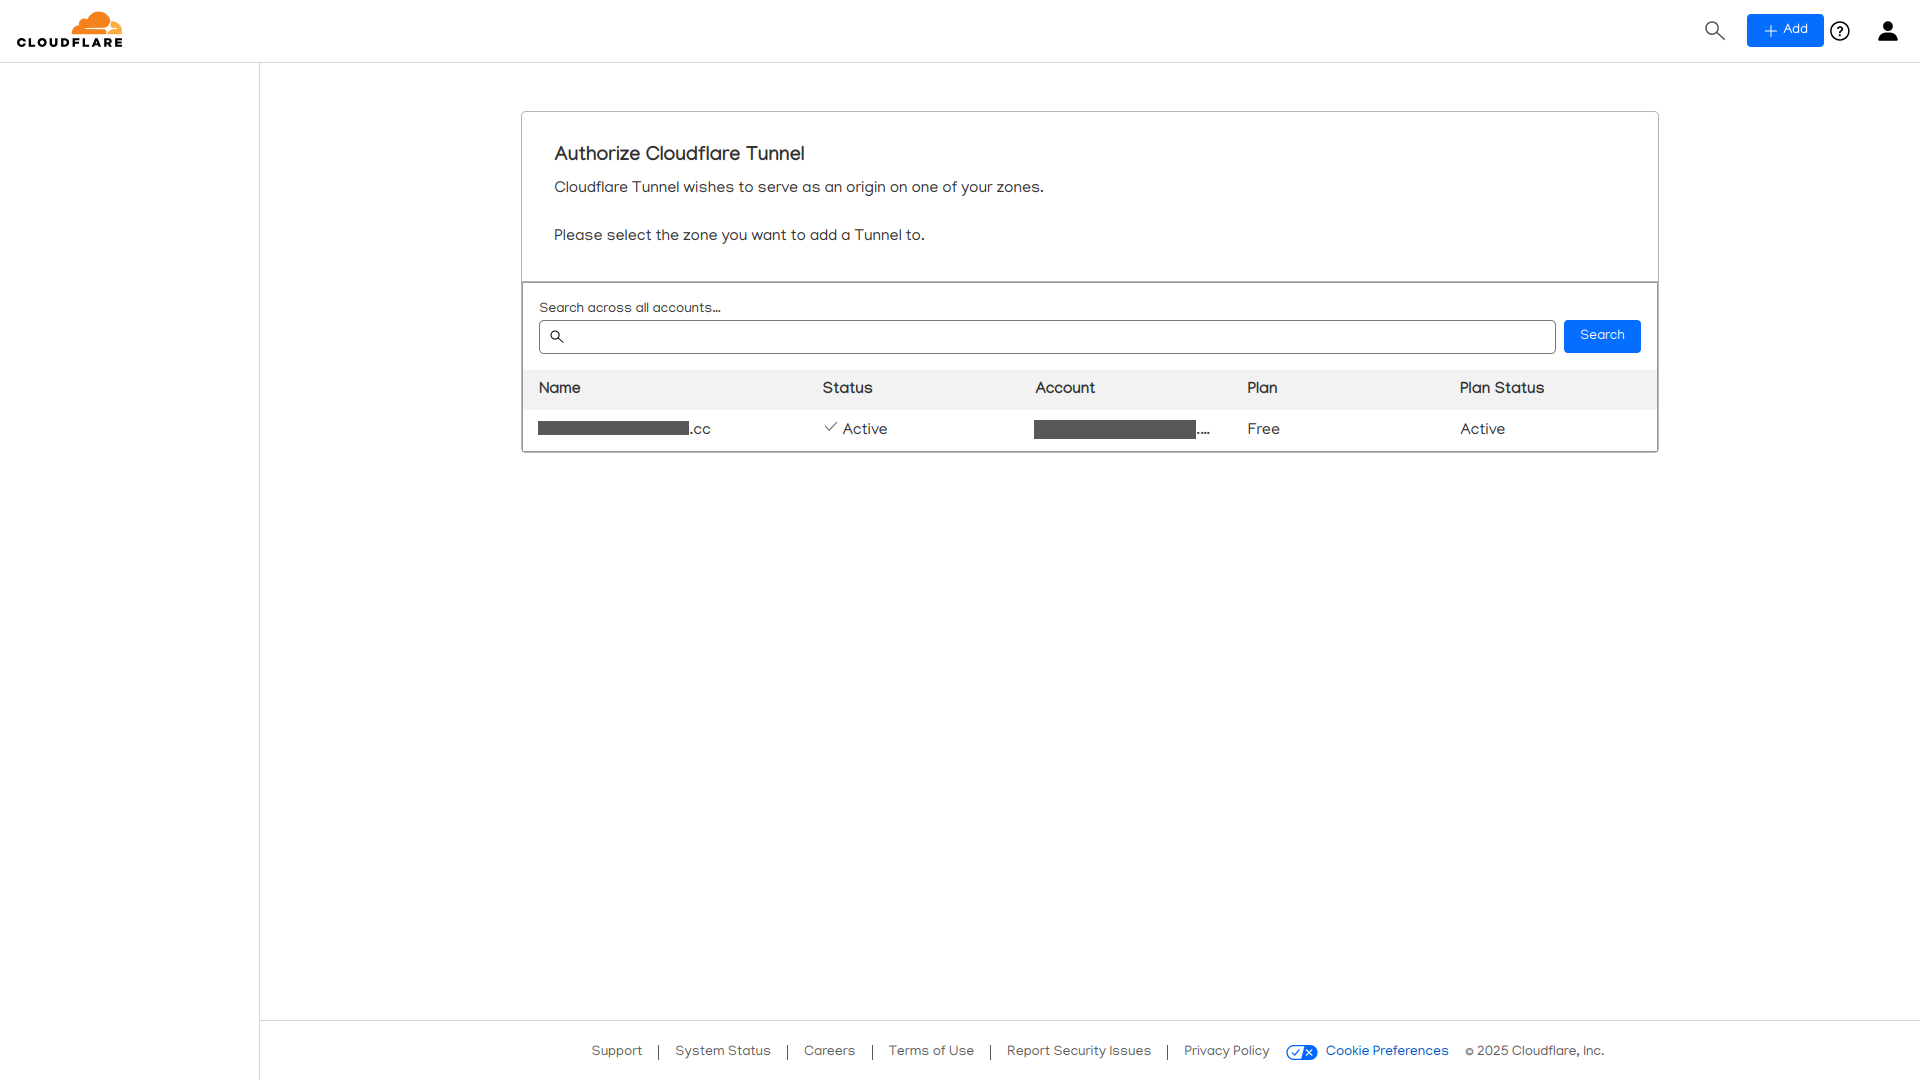
And once we select the domain we created a few moments ago, this window will pop up.
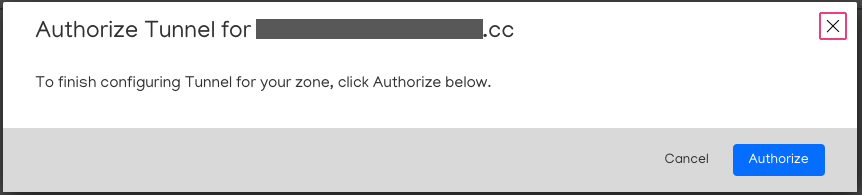
Once we click the Authorize button, we can close the browser. And now we can create the tunnel to make it an automatic service. For that, we will run the next command:
cloudflared tunnel create [Name you want to give the tunnel]
And it should give you an output similar to this one.
Tunnel credentials written to /home/vo/.cloudflared/[Long UUID].json. cloudflared chose this file based on where your origin certificate was found. Keep this file secret. To revoke these credentials, delete the tunnel.

Created tunnel [Tunnel name] with id [Long UUID]
Now, let's create the configuration file for Cloudflared with the tunnel information.
sudo nano ~/.cloudflared/config.yml
And we're going to put this text on that file:
tunnel: [Long UUID]
credentials-file: /home/[your user]/.cloudflared/[Long UUID].json

ingress:
  - hostname: [Porkbun domain]
    service: http://localhost:80
  - service: http_status:404
Once we have created this text file, now let's create the DNS records. We're almost there.
Create the DNS records to point to your equipment
There are two ways to create them. By hand and directly from Cloudflared. I honestly don't know how to do it by hand, so let's let Cloudflare do the job for us with the next command:
cloudflared tunnel route dns [Long UUID] [Domain]
And just like that, on our Cloudflare control center, the DNS records already appear for them to point to our equipment.
Now, on the top left on the screen, next to our email address, is the 'back' arrow. We click on it, and then, on that same side, more in the middle, the Zero Trust option is located.

On this new screen, let's go to the Networks menu. We should see this.
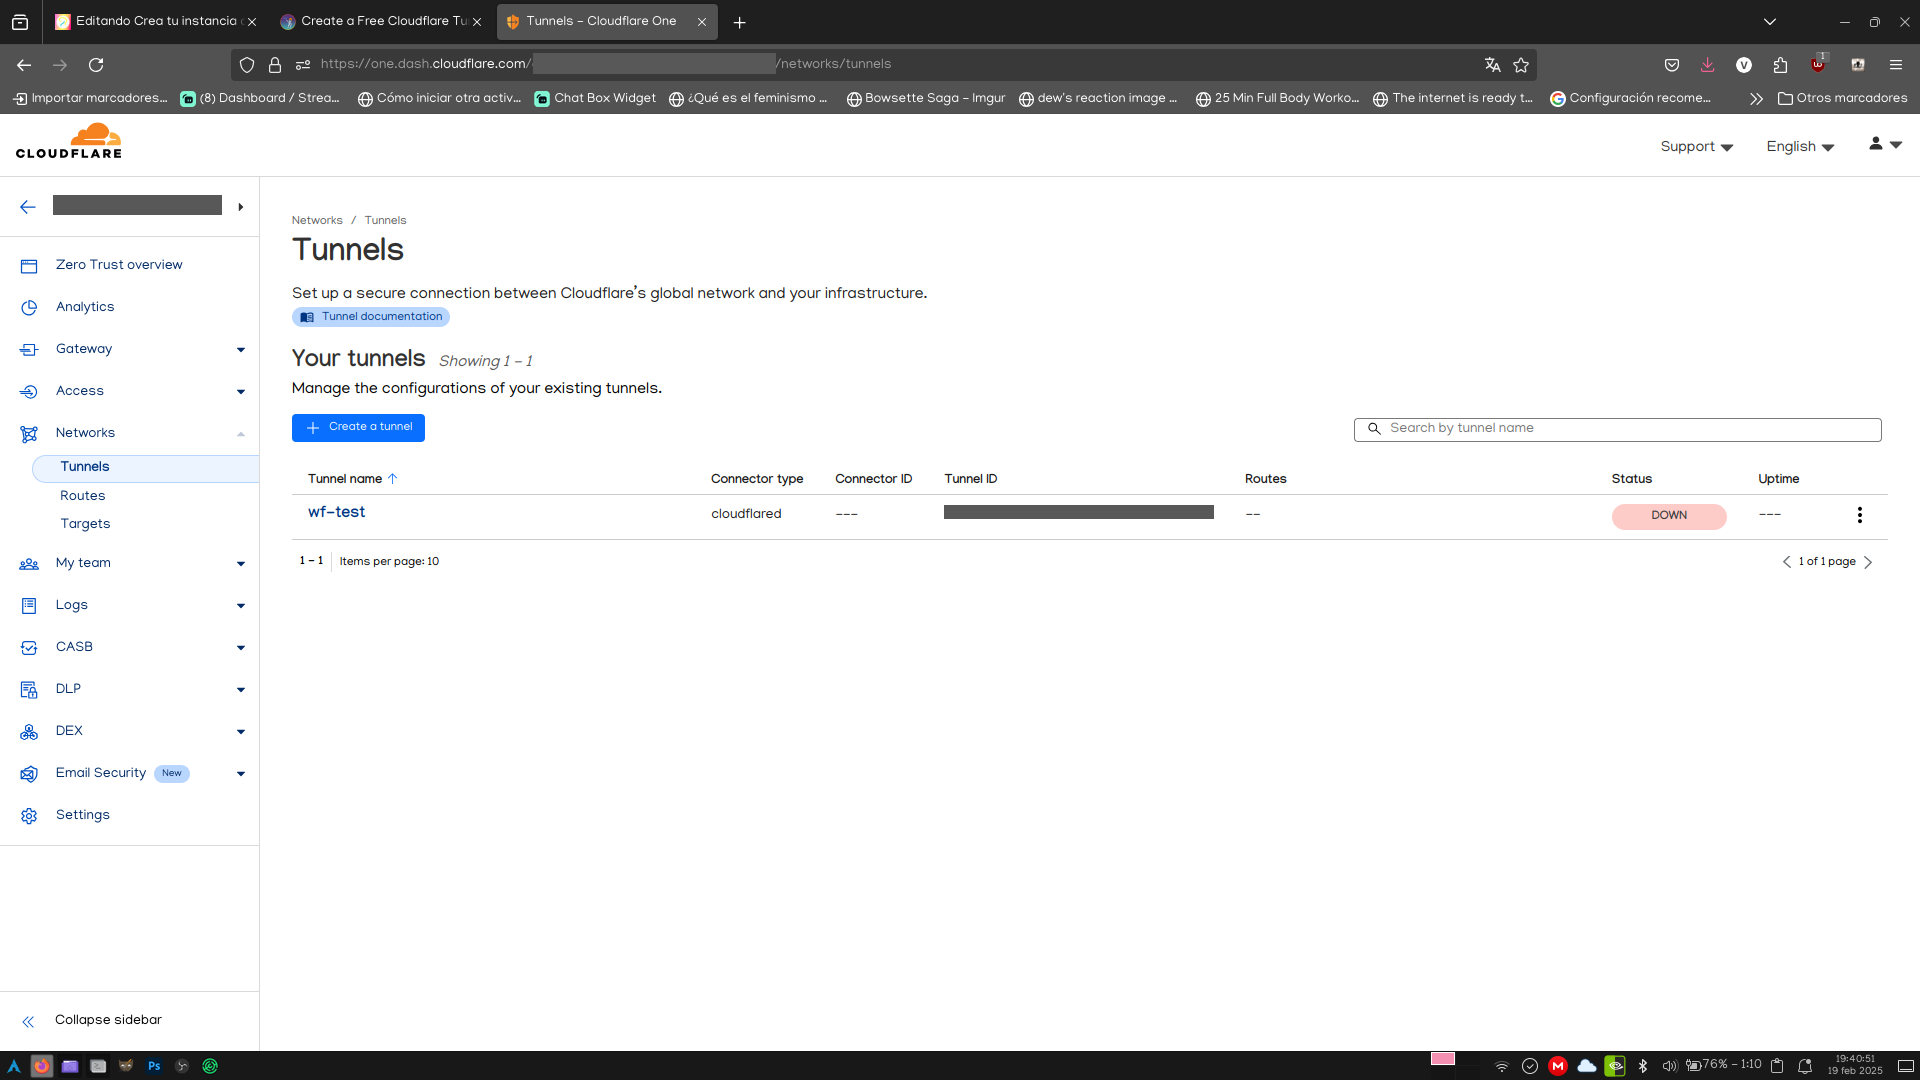
If it appears the tunnel we just created a few moments ago, we're going a good way. We click on that, and we will be starting the migration to a new control panel specific for Zero Trust. You just need to follow the presented instructions (you know, next, next, finish), taking in account you can only do this process once. And this screen must appear.
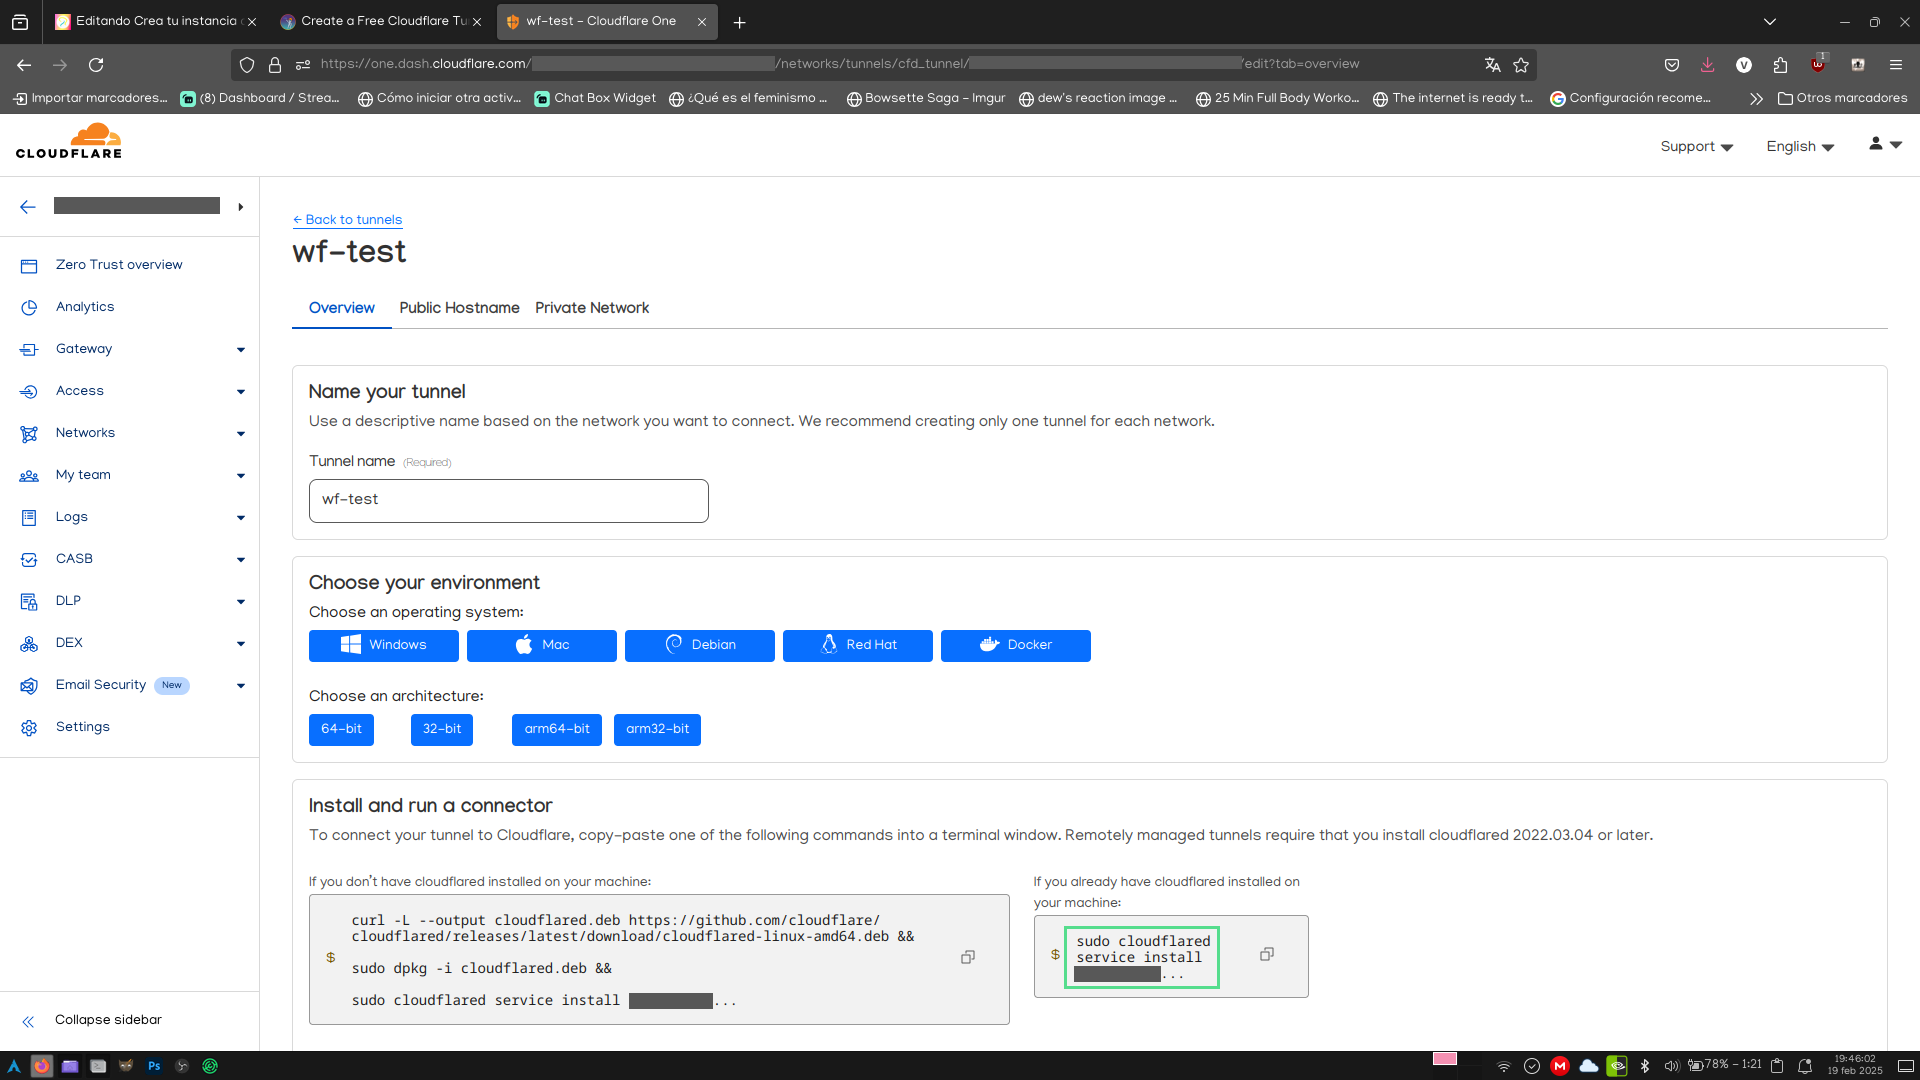
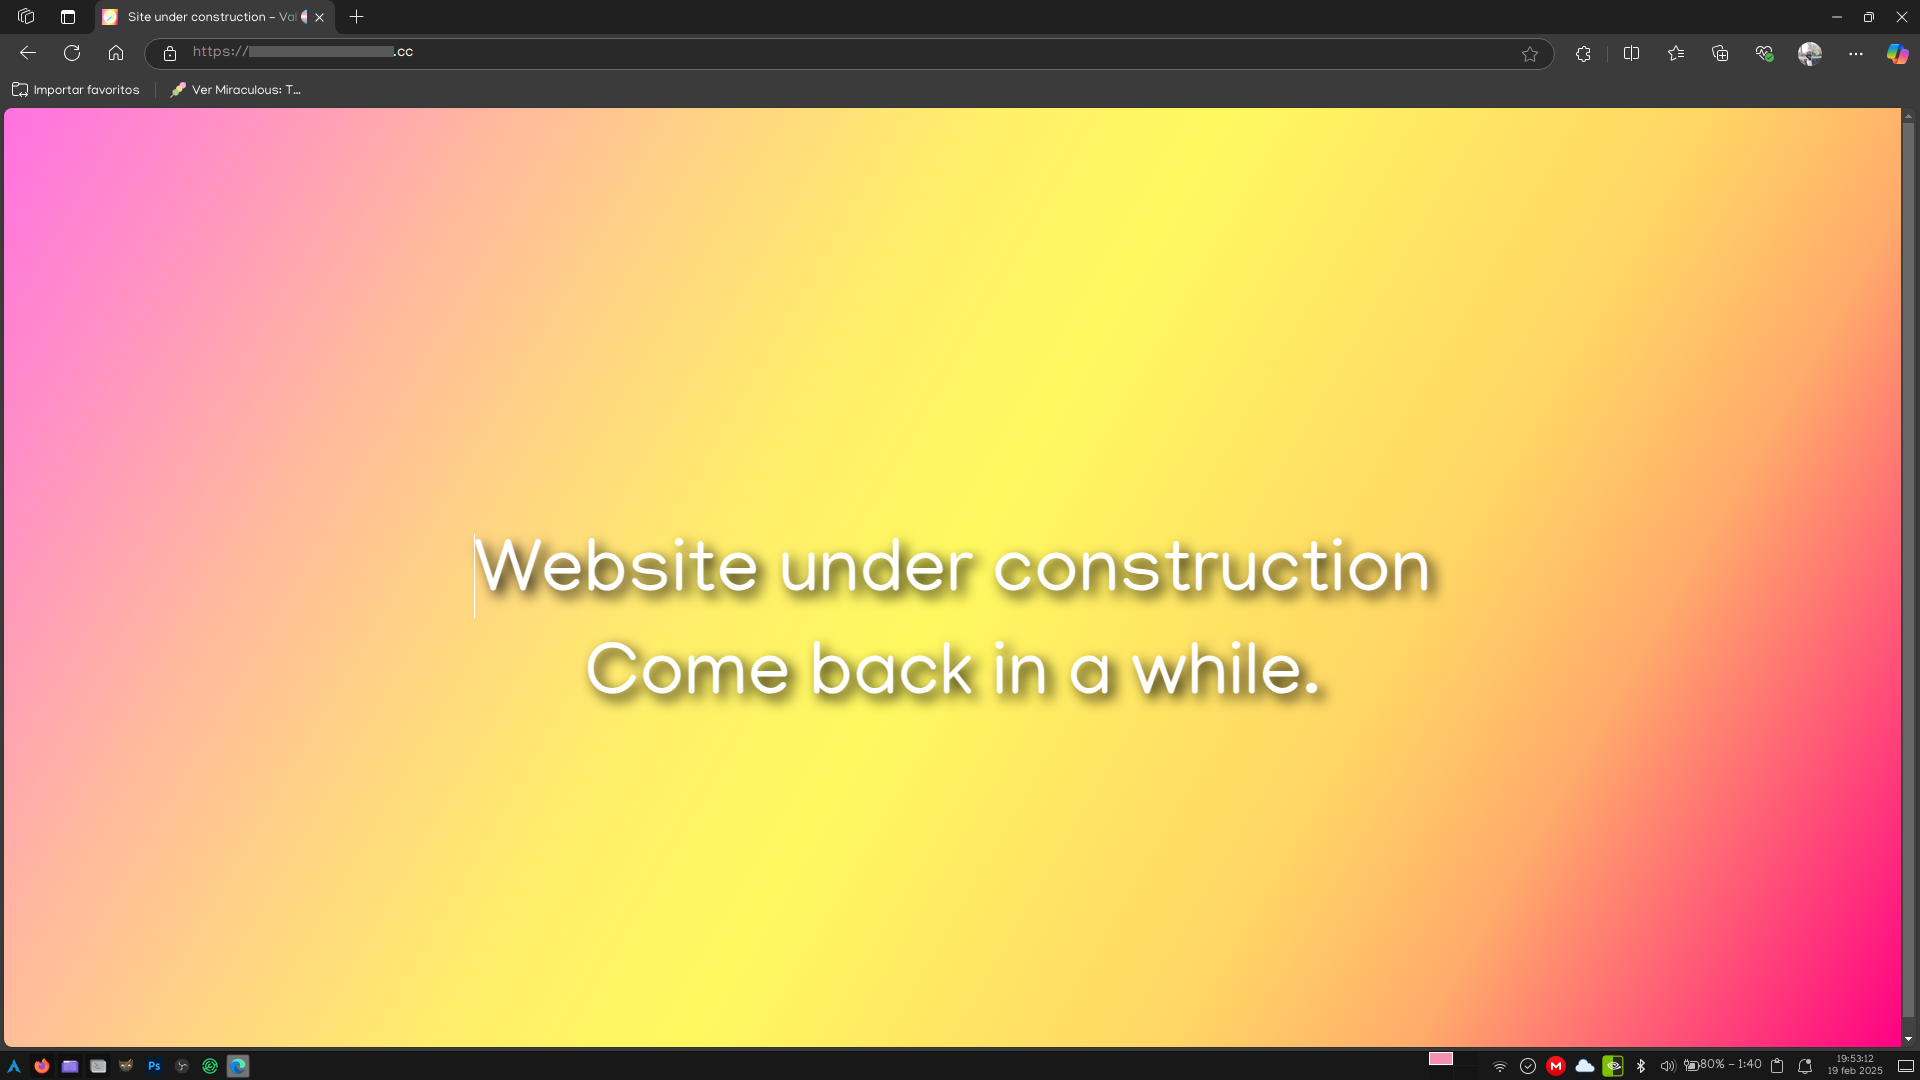
The highlighted command is the one we're most interested in, to install the service once and for all. The full command is not shown, so you have to click it to copy it, and paste it directly on the command line. Once we run the command, the service will be installed and running. Which will allow us to access our test page. Which in my case, I modified it a little.
Now we can forget entirely about Cloudflare and domains. Let's go to the next part of the process.
Let's create the WriteFreely blog!
With all things ready, finally, for everything y'all came for. How to download and setup WriteFreely. Let's start with the download.
Download and install WriteFreely
Do you remember the uname output? Now it's going to be useful to download the appropriate WriteFreely version.
If your architecture is amd64:
wget "https://github.com/writeas/writefreely/releases/latest/download/writefreely_0.15.1_linux_amd64.tar.gz"
tar -xvzf writefreely_0.15.1_linux_amd64.tar.gz
rm writefreely_0.15.1_linux_amd64.tar.gz
If your architecture is arm64:
wget "https://github.com/writeas/writefreely/releases/latest/download/writefreely_0.15.1_linux_arm64.tar.gz"
tar -xvzf writefreely_0.15.1_linux_arm64.tar.gz
rm writefreely_0..15.1_linux_arm64.tar.gz
If your architecture is armhf:
wget "https://github.com/writeas/writefreely/releases/latest/download/writefreely_0.15.1_linux_arm7.tar.gz"
tar -xvzf writefreely_0..15.1_linux_arm7.tar.gz
rm writefreely_0..15.1_linux_arm7.tar.gz
Now, let's configure permissions for the server folders, and move the WriteFreely installation files to the server folder.
On Arch:
sudo chmod 755 -R /srv/http/
sudo mv writefreely/ /srv/http/
cd /srv/http/writefreely/
chmod +x writefreely
On Debian:
sudo chmod 755 -R /var/www/html/
sudo mv writefreely/ /var/www/html/
cd /var/www/html/writefreely/
chmod +x writefreely
Done. WriteFreely is now installed on our server. But it's not configured yet.
Database initialization and WriteFreely setup
First, let's fo through the WriteFreely initial setup.
./writefreely --config
This command is interactive, so let's go step by step through the configurations.
On Server setup, with the [↑] and [↓] let's select Production, behind reverse Proxy, and let's press [Enter]– It will ask us for a port, and we can use whichever we want, although for purposes of this tutorial, I will use 8080.
On Database Setup, let's select MySQL. It will immediately ask u for the database user, where we will put writefreely, and the password we chose when we created the database when se set up MariaDB. Then, we will put the database name, which is also writefreely. We'll leave Host and Port as they are.
For App setup it's completely up to you. Whether you want a glog just for you, you want to create two or more blogs, or you want to create a small writer community. For purposes of this tutorial, I'll leave it on Single User Blog. If that's the case, you'll be asked to create the username, password and the name of the blog. In a few moments I'll also cover the configuration for multiple users.
Next, you'll be asked the public address, which is the domain we acquiredm preceded by https://.
The next question is important, because it ask us if we want to enable federation, for our posts to be propagated on the fediverse. I already talked about it on another post, so I think it would be worth it. I'm gonna enable it for this tutorial.
The next questions are about public usage stats. This doesn't affect the blog functionality per se, but allows services that monitor fediverse activity to access to them. I'll leave that to you.
After finishing this step, we finished the initial setup for a single blog instance, and part of the general configuration.
If we set up the instance for multiple users, there are a few additional steps we must follow. Let's run the next two commands:
./writefreely --init-db
./writefreely --create-admin [Blog username]:[Blog password]
And now, eeryone will run the next command to generate the certificate keys.
./writefreely --gen-keys
Before creating the WriteFreely service, let's finish the reverse proxy setup for the Apache server.
On Arch:
sudo nano /etc/httpd/conf/extra/httpd-vhosts.conf
On Debian:
sudo nano /etc/apache2/sites-enabled/000-default.conf
The files already there really are preview files we can modify, so let's erase all of the content on these files, and we'll paste the next content.
On Arch:
<VirtualHost *:80>
        ProxyPreserveHost On
        ProxyPass / http://127.0.0.1:8080/
        ProxyPassReverse / http://127.0.0.1:8080/
        ServerName [Acquired domain]
        ServerAdmin [Personal email, opcional]
        DocumentRoot /srv/http
        ErrorLog /var/log/httpd/error.log
        CustomLog /var/log/httpd/access.log combined
</VirtualHost>
On Debian:
<VirtualHost *:80>
        ProxyPreserveHost On
        ProxyPass / http://127.0.0.1:8080/
        ProxyPassReverse / http://127.0.0.1:8080/
        ServerName [Acquired domain]
        ServerAdmin [Personal email, opcional]
        DocumentRoot /var/www/html
        ErrorLog ${APACHE_LOG_DIR}/error.log
        CustomLog ${APACHE_LOG_DIR}/access.log combined
</VirtualHost>
Let's save the file, and restart the Apache service.
On Arch:
sudo systemctl restart httpd
On Debian:
sudo systemctl restart apache2
Now, let's create the WriteFreely service for it to run all the time. We'll do it with this command.
sudo nano /etc/systemd/system/writefreely.service
Now, it should show an empty file. Let's fill it out, depending on the system.
On Debian:
[Unit]
Description=WriteFreely Instance
After=syslog.target network.target mariadb.service

[Service]
Type=simple
StandardOutput=syslog
StandardError=syslog
WorkingDirectory=/var/www/html/writefreely
ExecStart=/var/www/html/writefreely/writefreely
Restart=always

[Install]
WantedBy=multi-user.target
On Arch:
[Unit]
Description=WriteFreely Instance
After=syslog.target network.target mariadb.service

[Service]
Type=simple
StandardOutput=syslog
StandardError=syslog
WorkingDirectory=/srv/http/writefreely
ExecStart=/srv/http/writefreely/writefreely
Restart=always

[Install]
WantedBy=multi-user.target
Now, we just have to enable the WriteFreely service.
sudo systemctl enable --now writefreely
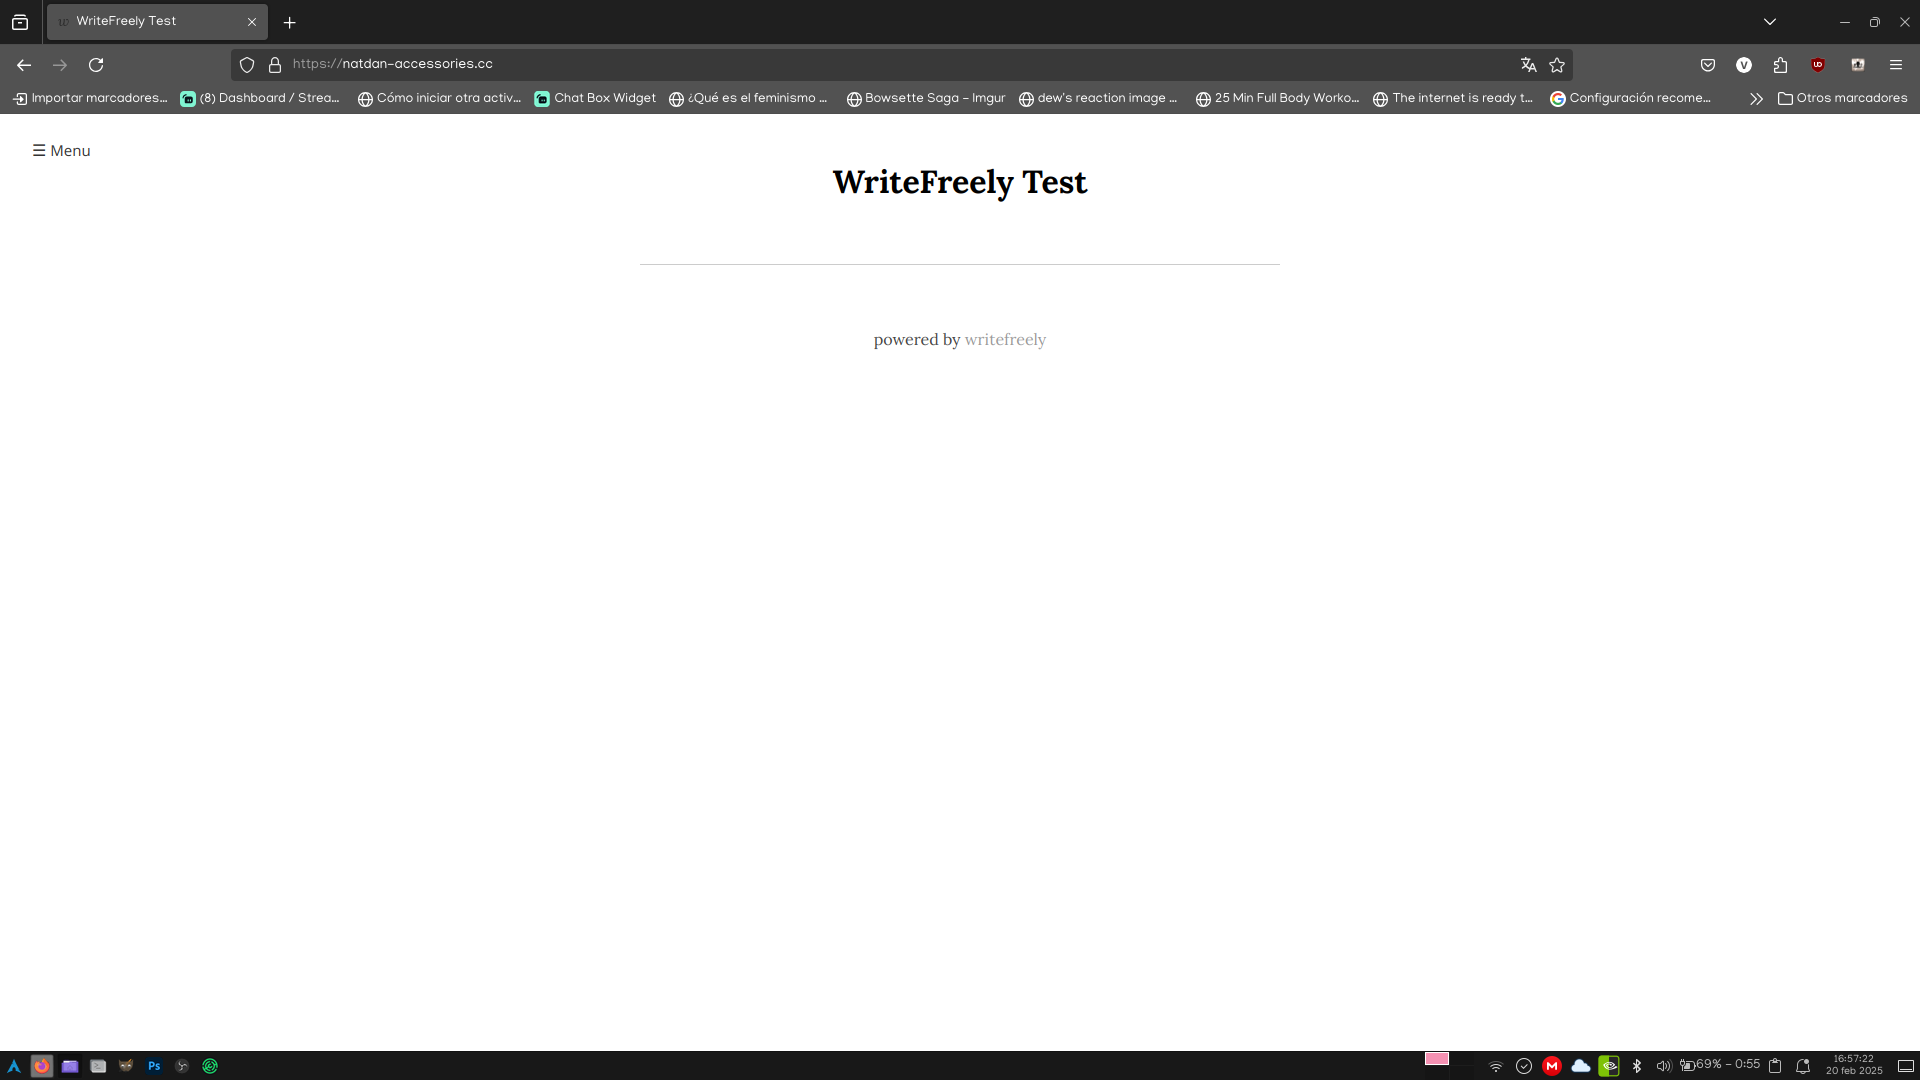
And if everything went perfect, we should get something like this when we go to our domain.
Now, let's login with our blog username, which will immeditely take us to the writing screen.
Write your first post
The edition screen is rather simple.
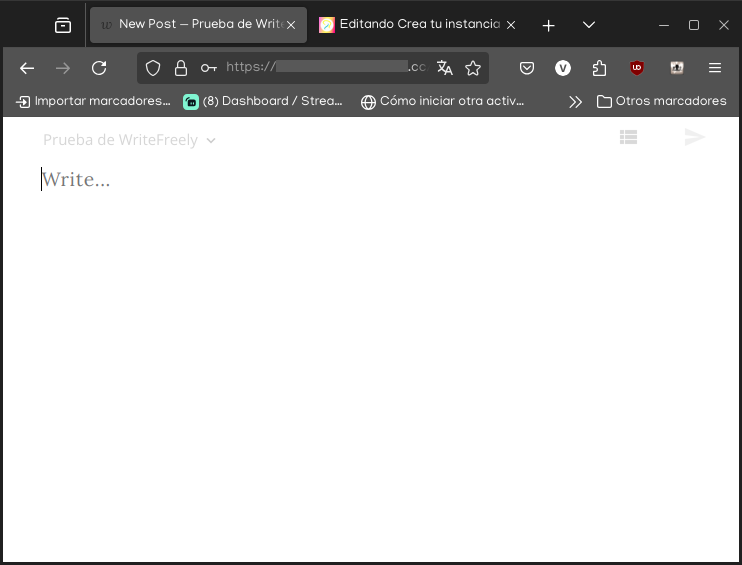
As is, there are not many edition options. So let's explain how it works.
The first line is always the title line. So to give a name to our post, just write something, and press [Enter] twice.
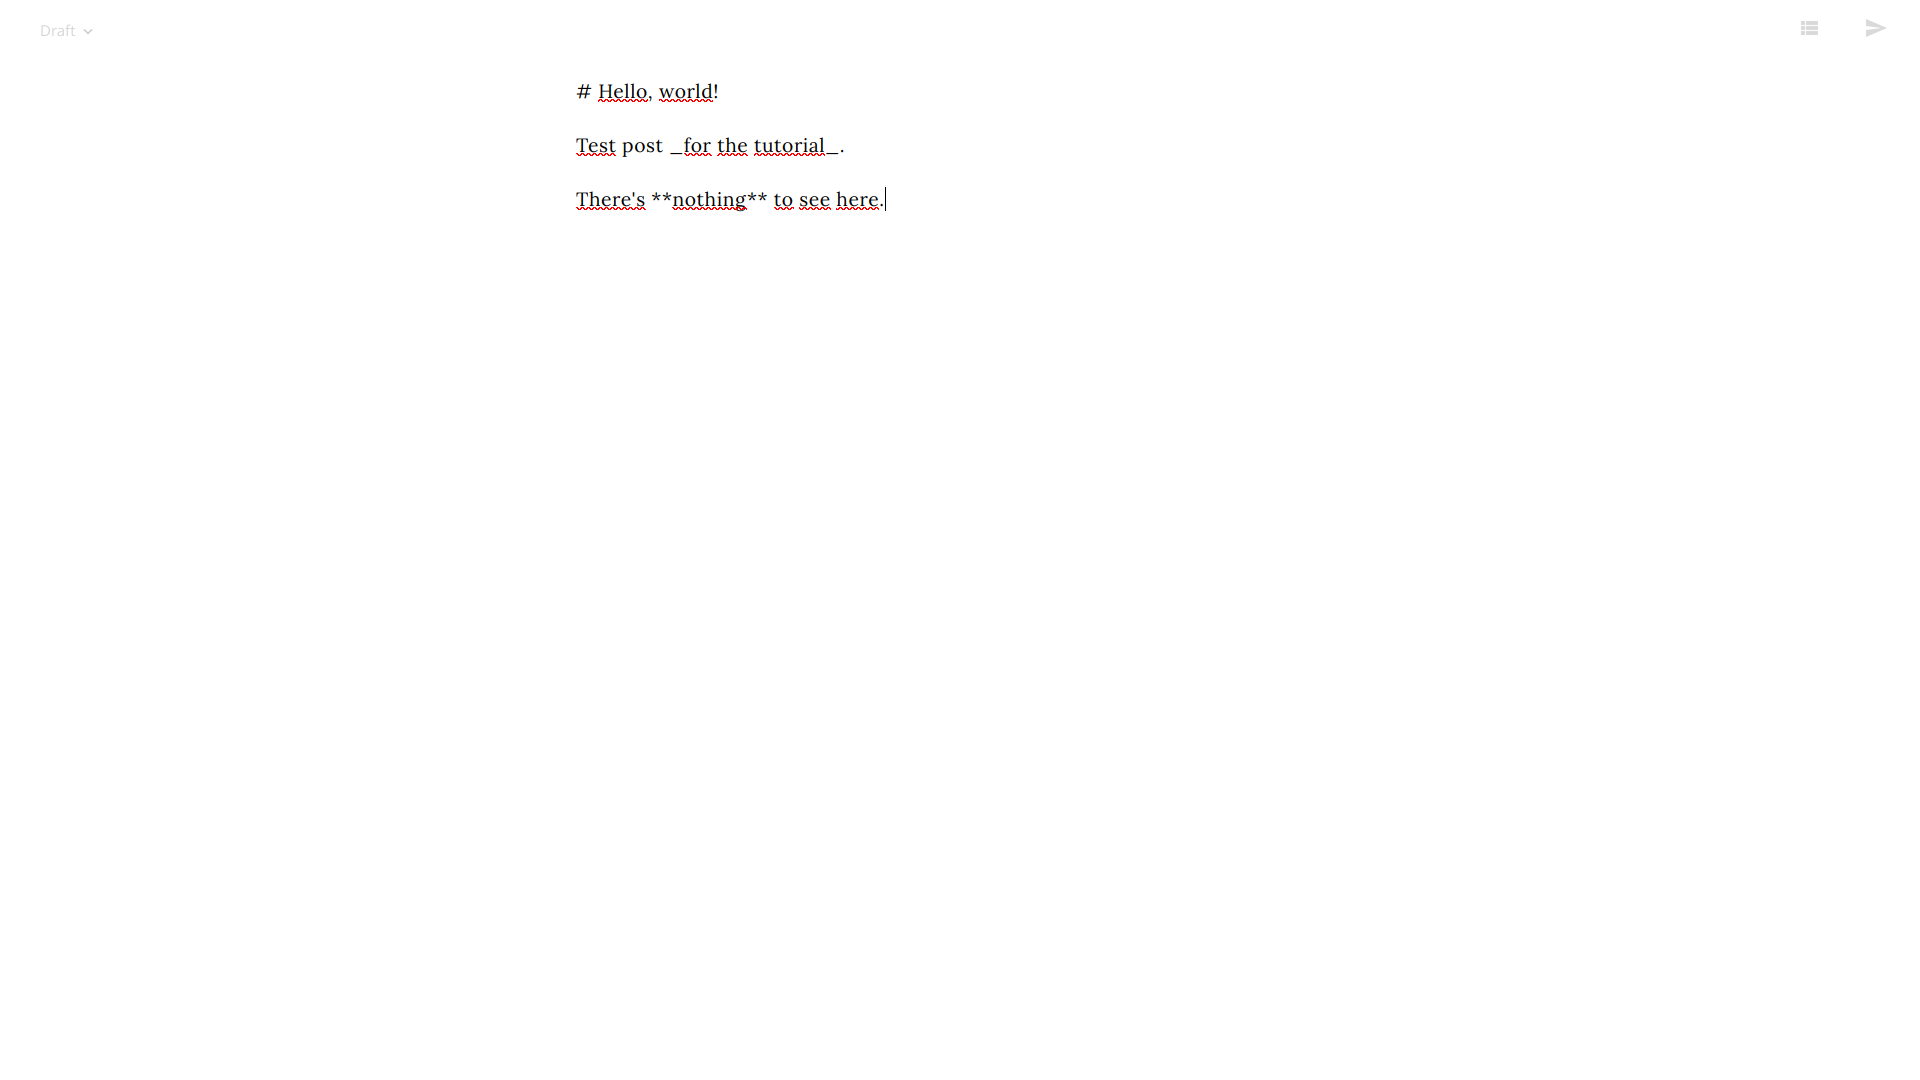
For the post body, we have several text format options. We can write using HTML and Markdown, even interchangeabily. I'll leave a comparative table for what you can do with the different available codes.
| HTML | Markdown | |
|---|---|---|
| Headers |
|
|
| Text formatting |
|
|
| Lists |
|
|
| Links |
|
|
| Images |
|
|
| Quoted text |
|
|
| Code blocks |
|
|
There are also things you can't do with Markdown, but you can do with HTML. More specifically, the tags <iframe>, <audio> and <video>.
And once you have entered some text, and clicked the Publish button...
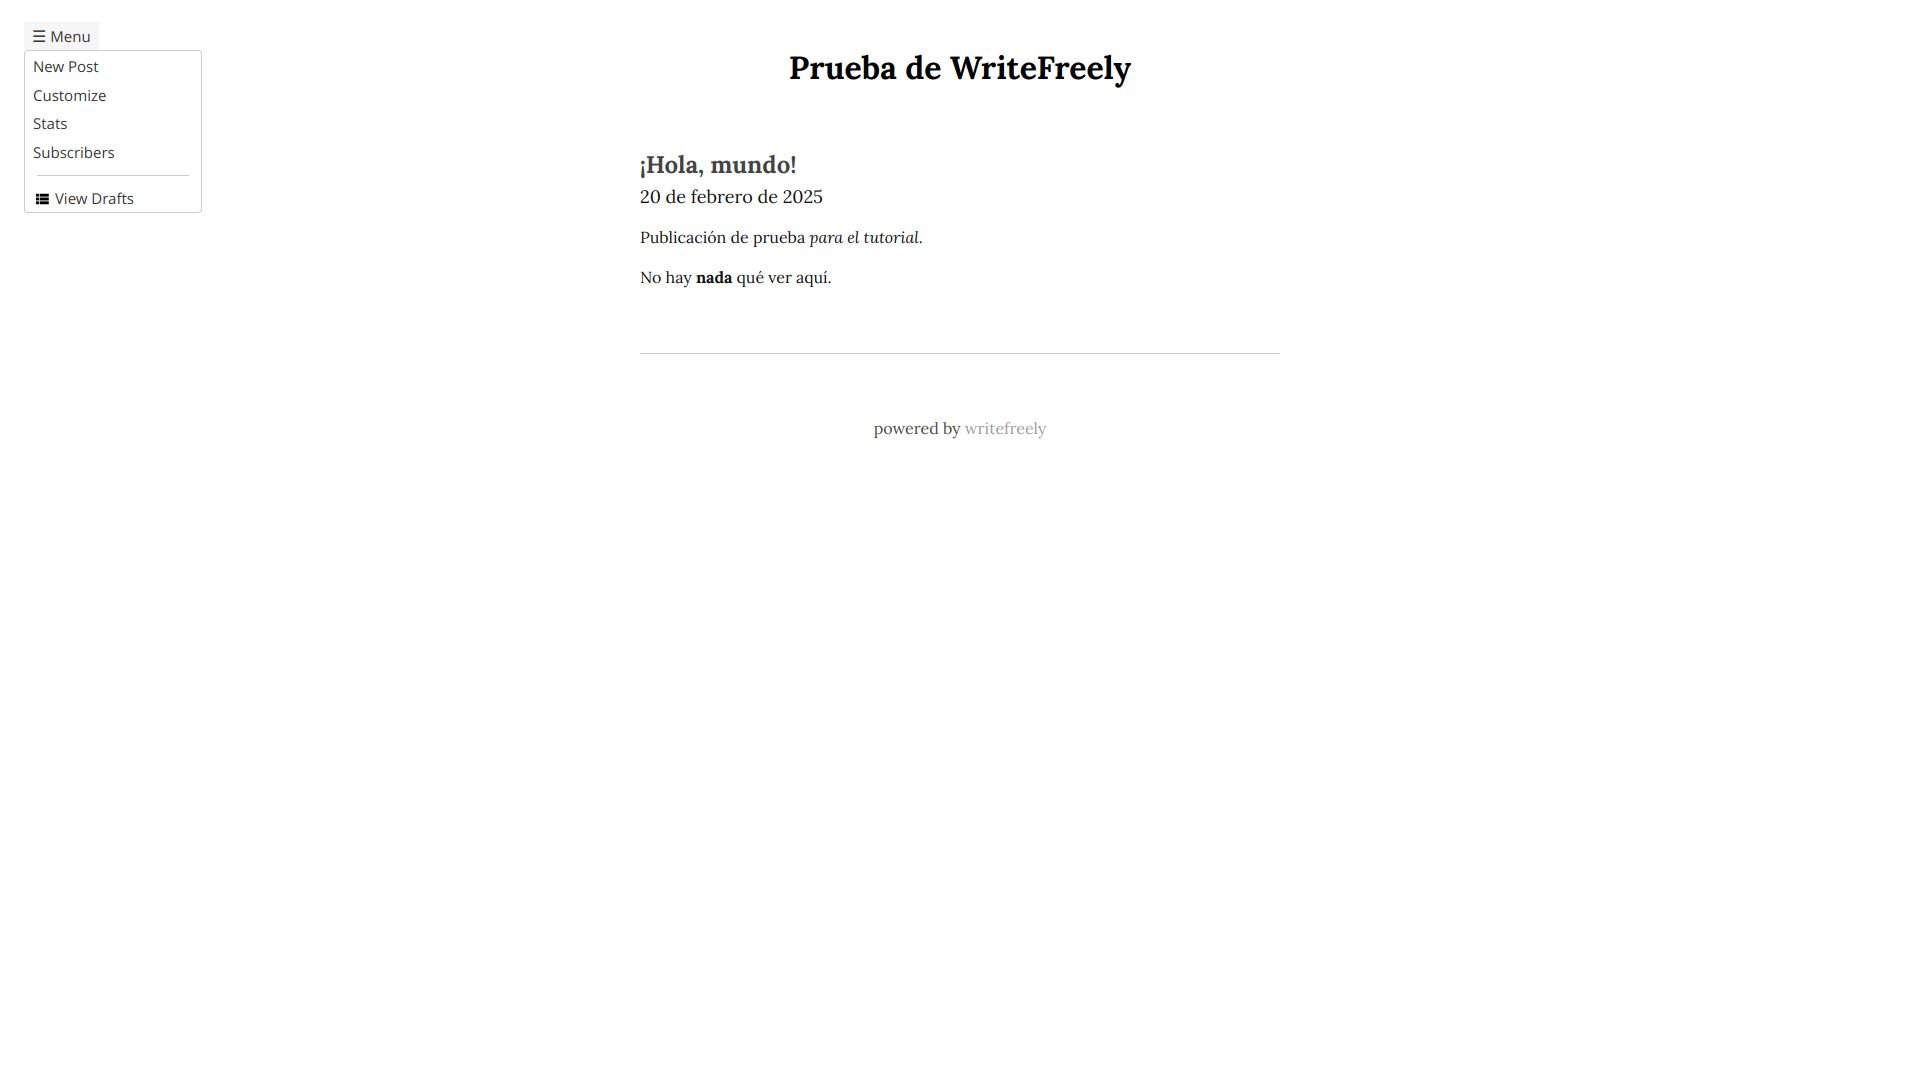
...it will appear to share it with the world.

Once we have made our first post, let's customize our blog.
Configuring your blog options
We have several options for our blog. For that, let's go to the menu on the top left on the screen.
Now, on this new screen, we're going to see several options. Let's explain them all.
The first two text fields are the blog name and description. Completely personal, so I can't guide you on that.
On the URL section, we can see the public address, and if we enabled federation, we will alsoo see our fediverse handle. Useful if we want to be followed on Mastodon, Friendica, Pixelfed, and other fediverse platforms.
On the Visibility section, you can say if you want your posts to be visible for anyone, people with the link, only you when you login, or anyone with a password you define.
For the updates, The RSS feed and federation through activityPub are active, so people can follow your blog from their favourite RSS reader, or even from their Mastodon account, to say something.
The display format allows three options. The traditional blog format shows the most resent posts first, and also displays dates. The novel format hides dates and shows the oldest posts first, so you can read them by chronological order. And the notebook format hides the dates, but shows the most recent posts first.
The text render allows us to enable Mathjax to parse mathematic formulas so these can be correctly visualized. Markdown is enabled by default.
The Custom CSS section allows you to change your blog appearance. There are diverse themes on write.as so you can study how they are made, and even copy them in full. And actually, I just changed a little this blog's CSS for it to use more the screen width, without really changing the appearance (I'll do that later). I'll leave you the CSS:
body#post article{
    max-width: 75rem;
}

article img{
    display: block;
    margin-left: auto;
    margin-right: auto;
}
On the Post signature section, you can enter any text you want to be added to the ending on all of your posts.
And finally, on the Verification section, you can put the address of another website you interact with on the open web or the fediverse. Like your Mastodon profile.
But those are not all of the options we can modify. Because if we go to the submenu on the name of our instance, we're ginna find several more links.
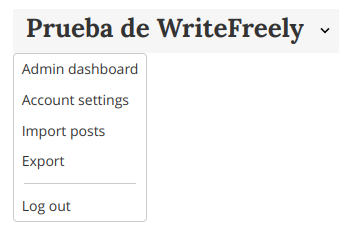
For now, we're gonna focus on the Admin options.
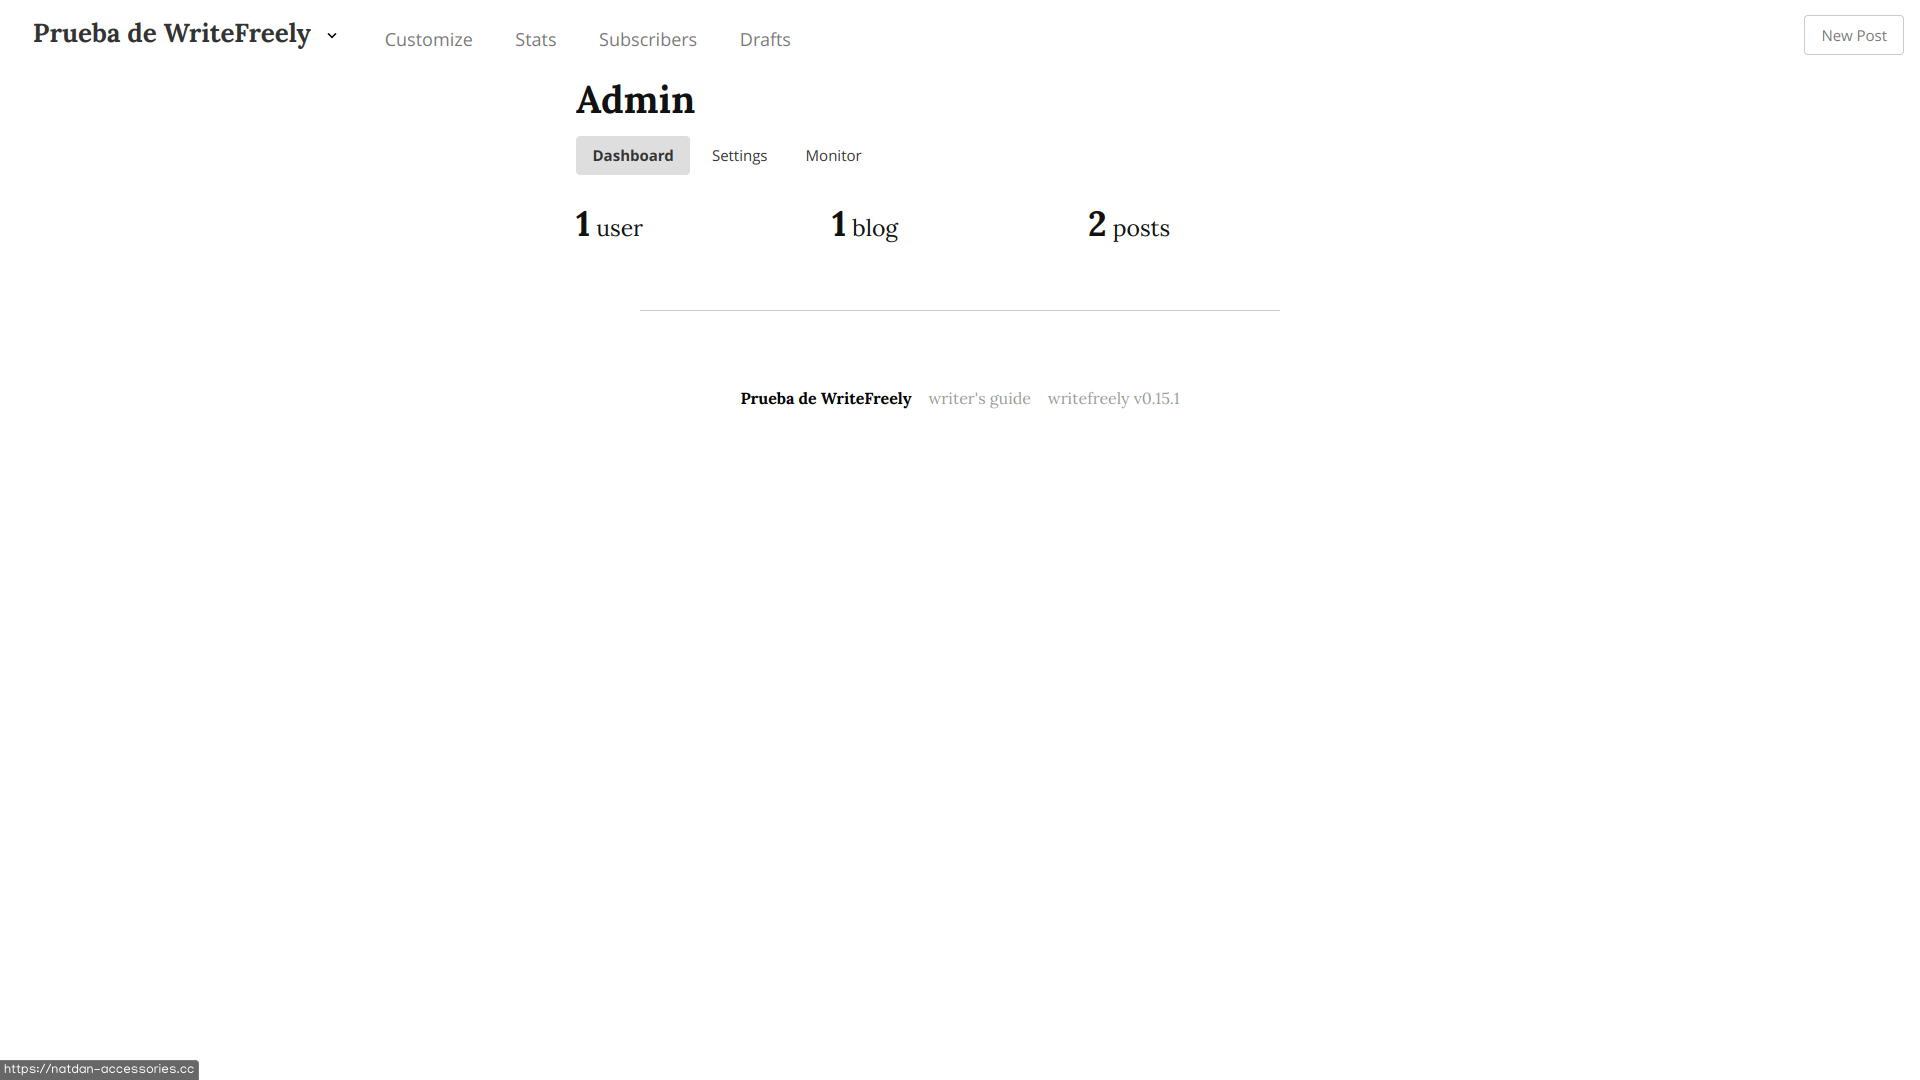
On this first screen we don't see much information, besides post stats. But precisely where we see the submenu for this screen, there are three tabs, and the one we're really interested in is the second one, Configurations.
The Host tells us our WriteFreely instance address. Not editable.
The Community mode allows you to know if the instance is set up for single user, or vaious. As we set up on the WriteFreely initialization.
If we setup our instance for ultiple users, we have five more options.
The first option is the landing page for not registered visitors. By hosting several blogs, there might be several pages, and even a general feed for all of the registered blogs (in fact, that's how this instance is configured, by having one user for the English blog and another one for the Spanish blog, and the landing page is that feed).
The option for Open registrations allows you to decide if you want to allow external people to register to your instance.
The Allow account deletion option let's you decide if you want users to delete their account (and blogs) whenever they wish, or if only the administration can delete users.
the allow invites option is useful when the registration is closed, because it allows you to decide ig the registered users can invite people, if only the admins can invite, or if invites are locked.
And finishing with the multiuser instance options, the Reader allows you to enable or disable the blog feed for the instance.
Going back to the general options, the Private instance option limits access to the blogs to people who has an account within the instance. This may be useful for, let's say, private communities like reporters for a local newspaper.
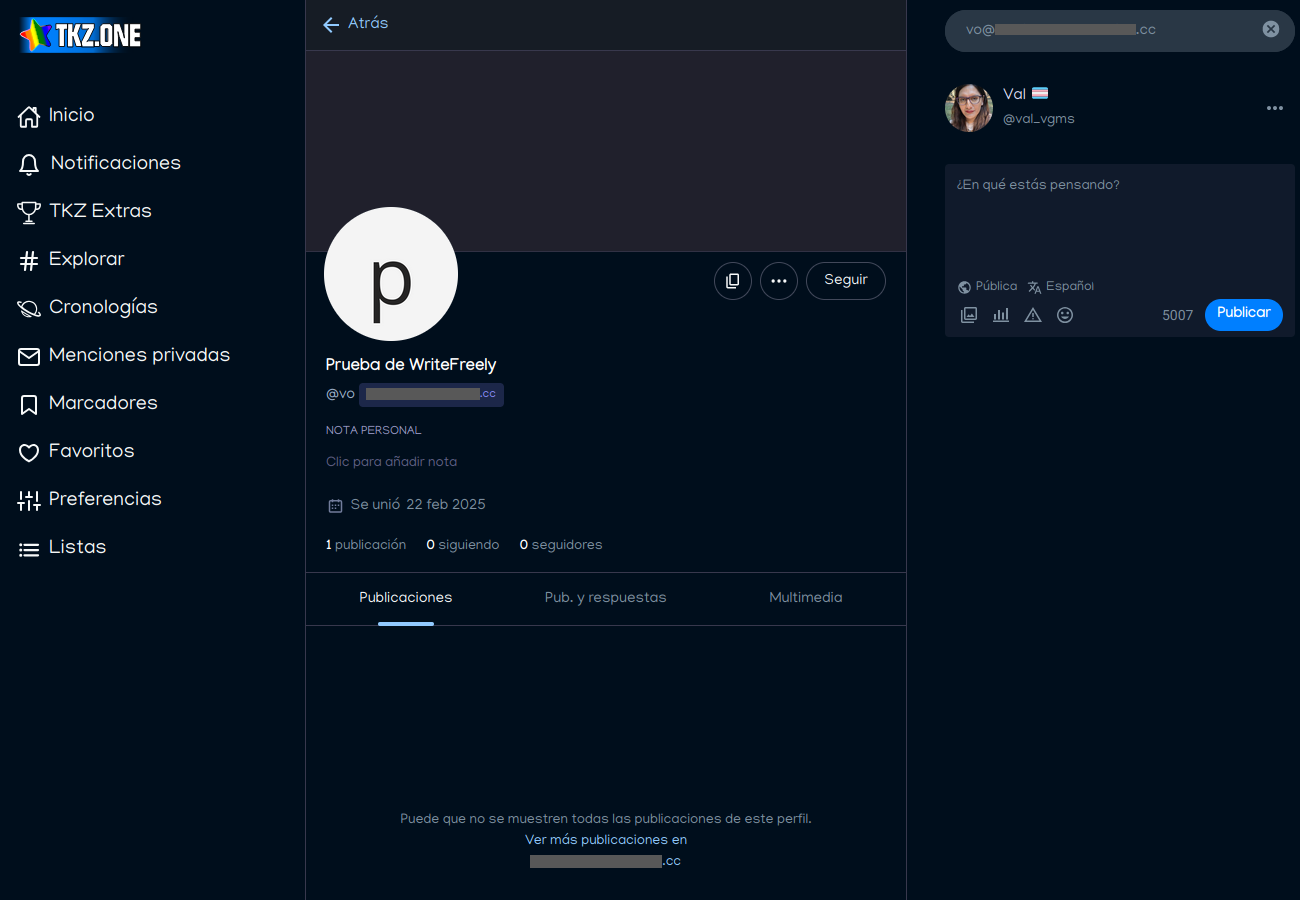
The federation option allows your blog to be searched from the fediverse. For example, I coould search the profile for the instance for this tutorial from my Mastodon profile.
The Public stats options allows the instance stats to be monitored by services like Fediverse Observer.
The Web monetization option allows you to receive micropayments from visitors to your blog. But I haven't explored this option in depth because I donestly don't care about receiving earnings for this blog. But if you're an independent reporter, exploring this feature may be useful for you.
And finally, the username length allows you to configure how short can be a username. You can set username as short as one character, or as long as you wish.
These are the basic but most importan options you can configure from your browser interface. But there are more options you can modify on the WriteFreely configuration file, located next to the executable (/srv/http/writefreely/config.ini on Arch, and /var/www/html/writefreely/config.ini on Debian). And the WriteFreely project has a page dedicated to explain the editable options in further detail.
Translating (most of) the User Interface
So far, we have seen the WriteFreely interface in English. But can we really change the blog interface to Spanish (or any other language)? Honestly, no. There are things that must be changes from the source code to acomplish a fully translated interface. And I don't know enough about the go language (to not say I don't know a thing) to modify the WriteFreely source code. What I do know is enough HTML to modify the template files the software uses for the interface in Spanish.
In fact, I already modified the templates for this instance. I'll leave a comparison for how would look the Customize page for both the tutorial instance without modifications, and this instance already modified.
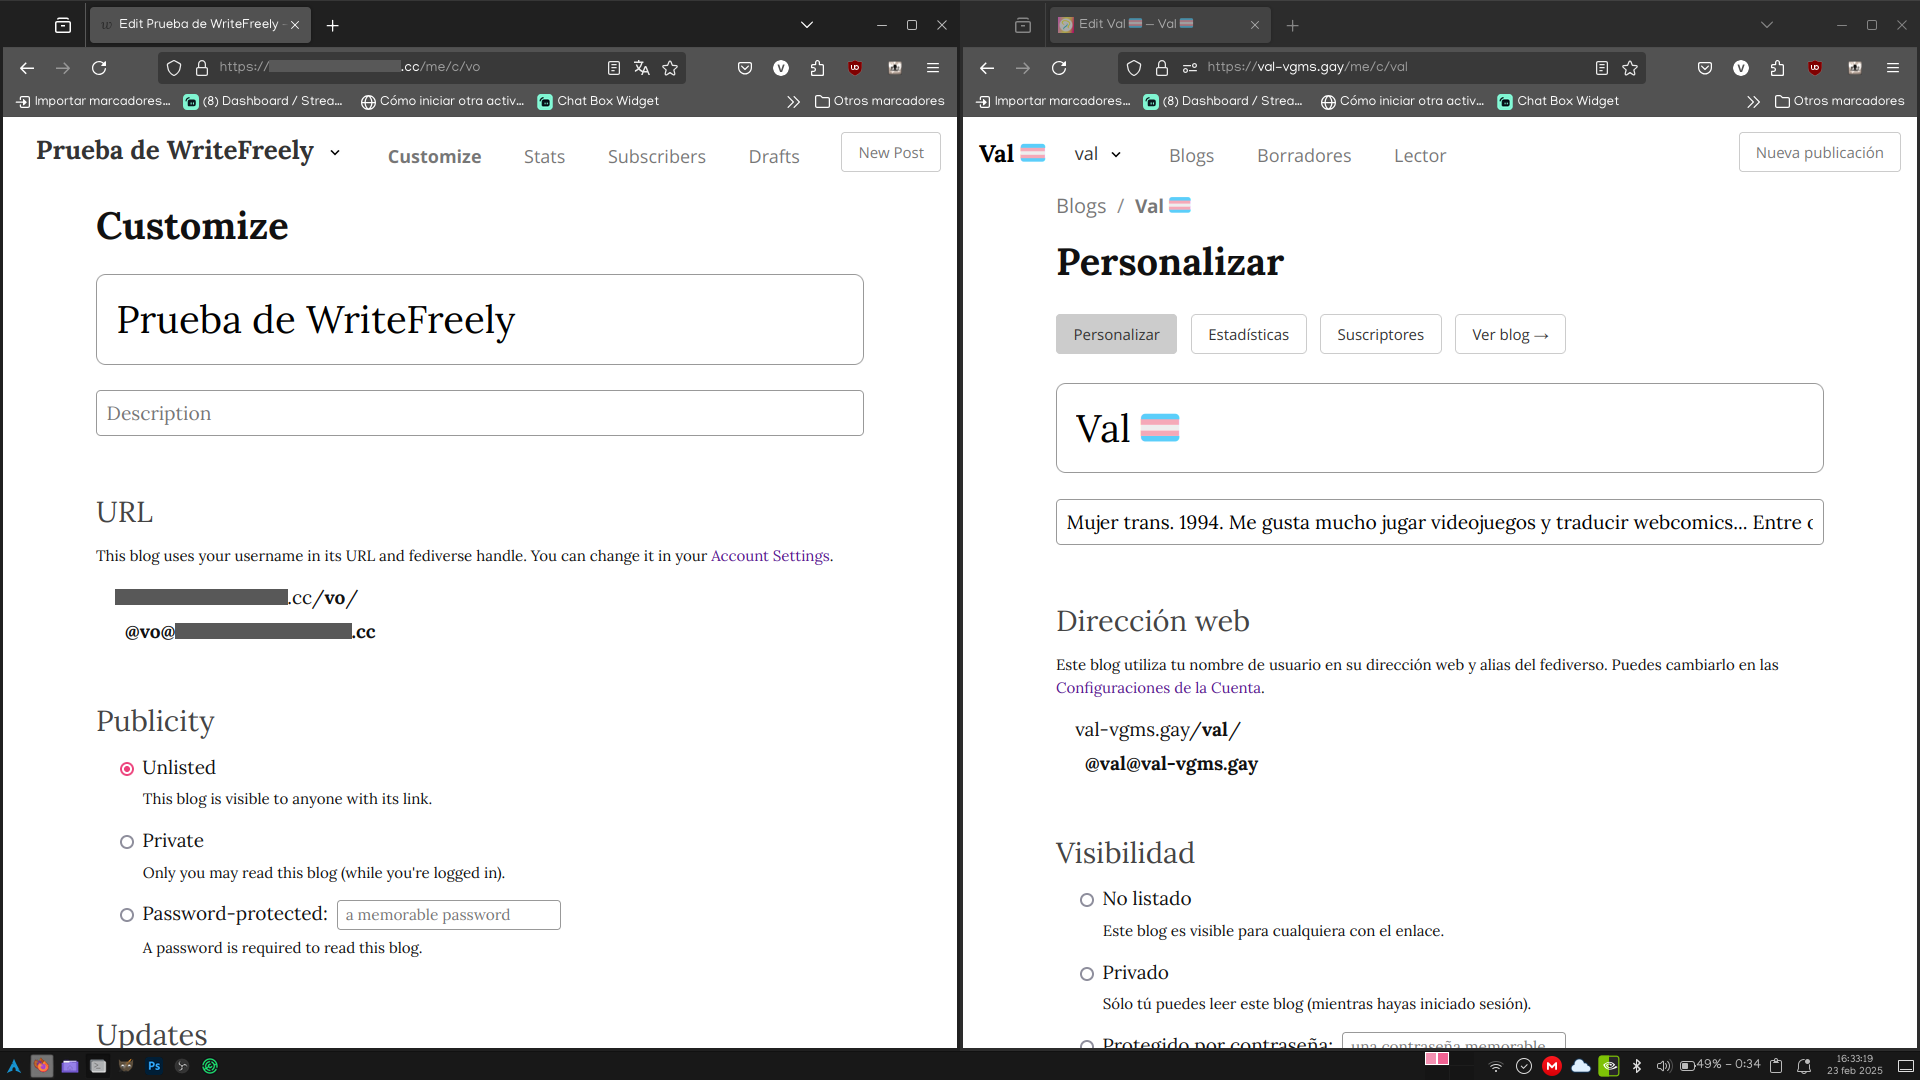
And if you want to download the Spanish modified templates (for some reason lol), I conveniently have a zip file you can download by clicking here. Once you have this file, you just have to extract them and replace the folders in the server.
You must take in account these files are for version 0.15.1, which at the time of this writing, is the latest version. I might update the files for every new release, but knowing myself, I'm gonna forget at some point.
Enable email subscriptions
Really nice for people to be able to follow you on the Fediverse, and all. But what about people without an account around these parts? Well, besides the RSS feed, we have the option to enable email subscriptions and password recovery. However, it's not integrated into WriteFreely per se, but we have to rely on Mailgun, an external free service, but with additional paid features. Let's review the account setup to add it to WriteFreely.
The registration page for Mailgun is really easy and direct, even more than the one from Porkbun.

And once we fill the form, the account is created, but not active yet. It must be verified first, as indicated in the panel on the top.

To validate our account, we must enter our phone number, selecting the country.

Once you enter your number, you'll receive a text message to complete the validation. We introduce it, and our account will be verified.

Now, we'll fo to the Get Started tab to start the configuration.

We will even have our next step highlighted on this control center. Which will the Mailgun configuration easier for us. Let's go with the API key creation.

We will just give a name we just created. It must not be something elaborated. And once we have our name, the key will be created.

Copy and save it in a safe place.
For the next step, which is sending a test email, we have two options. Via API, or with a SMTP client.

For API, we have codes for different languages to integrate in the projects.

And with SMTP is more on the line on what we have always used with any email app. Login and all that.

But for now, we will ignore the test email. :P
What interests us is the next part, which is adding a custom domain.

On the Domain name field, we will enter the domain, and click the blue button. Which will take us to the next screen.

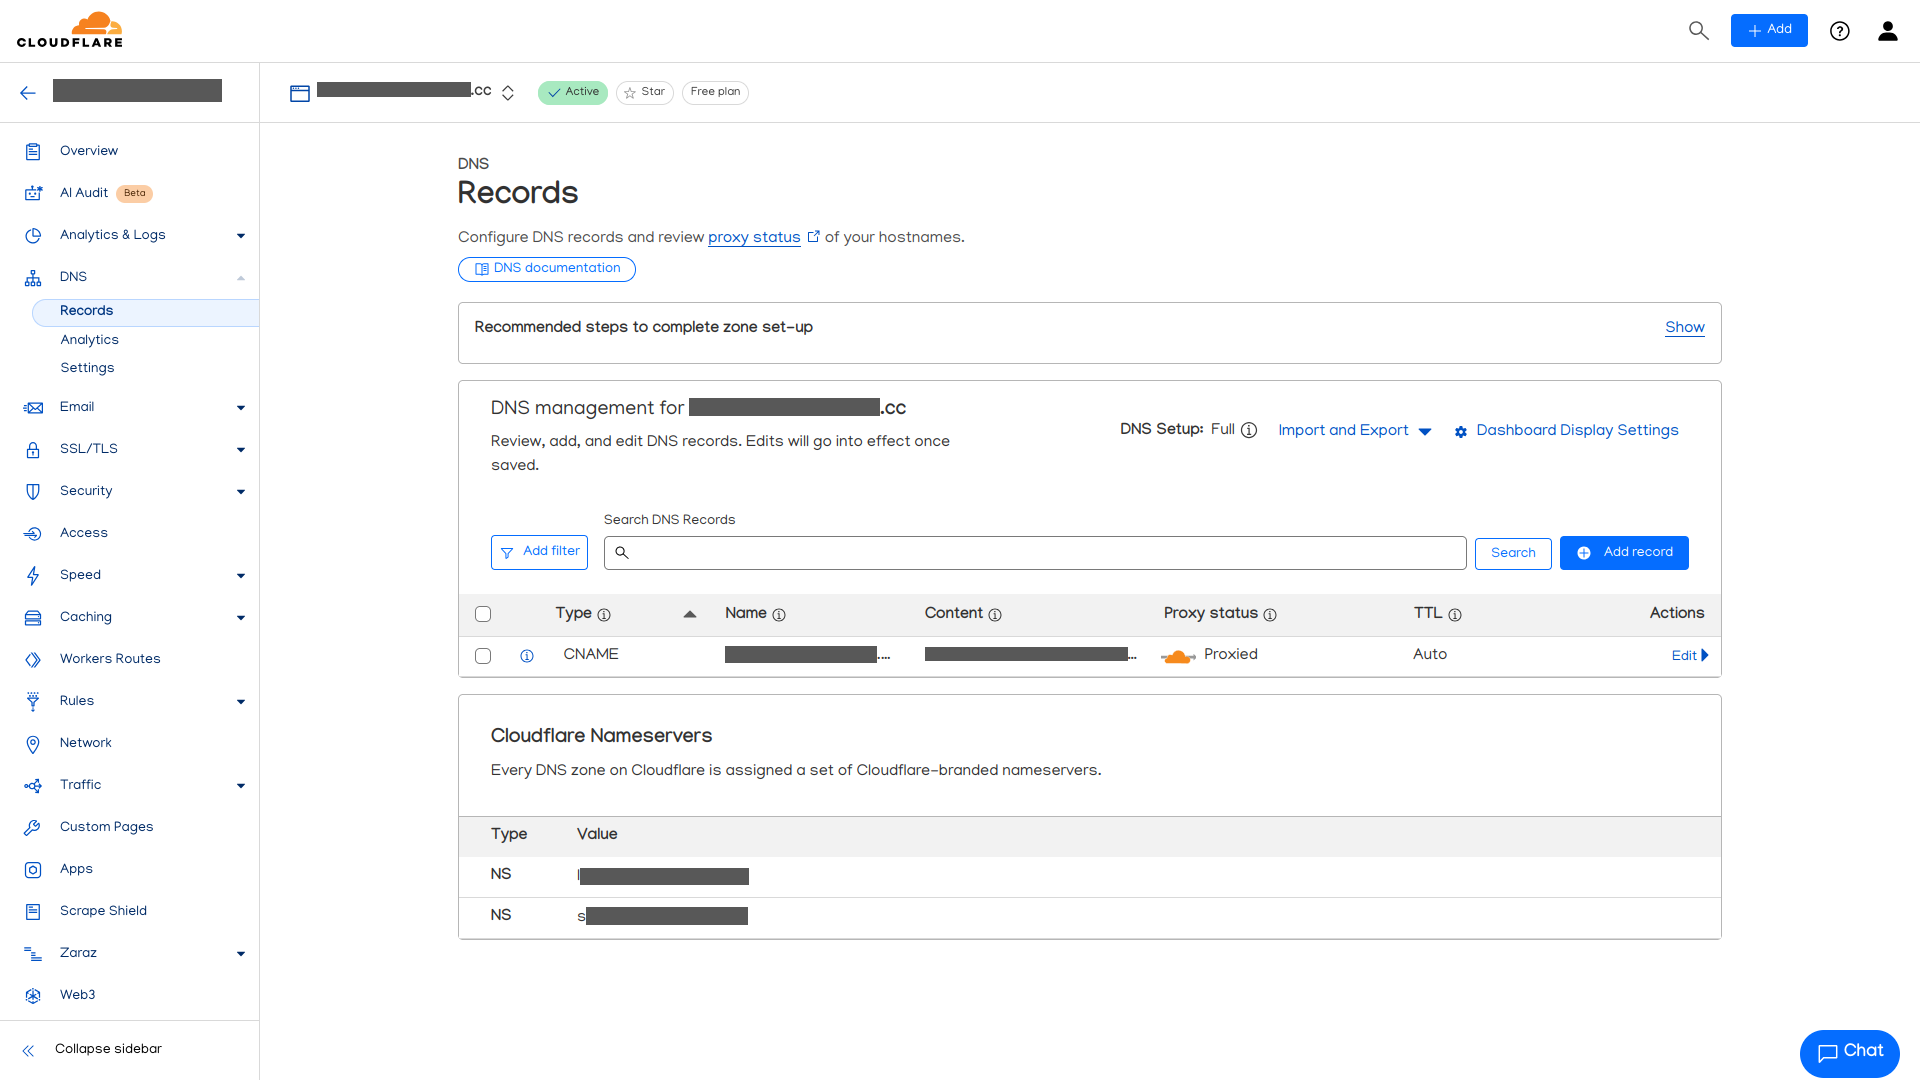
This information will be useful to enter into our Cloudflare control panel into the DNS records for our domain. To enter it, let's go to the account home, let's click into our domain, and on the left panel, we click on the DNS option. We should be here.

And to add the Mailgun records to Cloudflare, we just press the Add record button, which will open these fields.

Now, we select the type given by Mailgun, and copy the Mailgun host and paste it on the Name on Cloudflare, and the Value in Mailgun goes into Content in cloudflare. Let's do this on each Mailgun providedentry, and in the CNAME entry, we will disable the Proxy switch.
Optionally, we can write into the Cloudflare comment to indicate these are the Mailgun records. I did it for organization, but it's not necessary.
Once we have finished to add every entry, on Mailgun we will press the Verify button located at the top. If we did it right, we will even receive an email indicating the setup was successful.

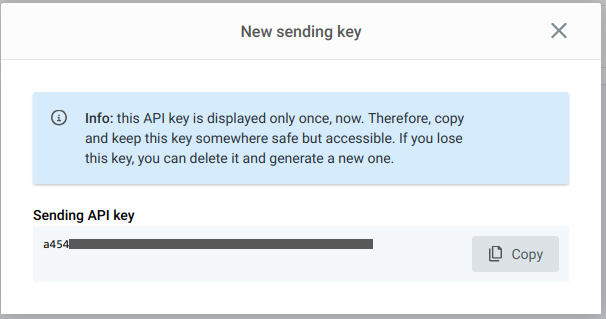
Now, on Mailgun, let's generate the new email send API for our domain going to the Sending keys tab.

By pressing the Add sending key button, we will set up a new API key, this one for profuction for our blog. We will give a new name, and we will be given a new generated key only once. It's important to copy it, because we will use it later.
Now, let's configure the keys directly on WriteFreely. For that, let's open the configuration file.
On Arch:
nano /srv/http/writefreely/config.ini
On Debian:
nano /var/www/html/writefreely/config.ini
And on this file, let's sear these lines.
[email]
domain          =
mailgun_private =
On domain let's write our domain, and on mailgun_private the key we just generated.

Save the file, and restart the WriteFreely service.
sudo systemctl restart writefreely
And now, if we go to the Customize options on our blog, on the Updates section, we will see a new option to enable email subscription.

Once enabled, on the main page for your blog, right at the bottom, external users will be able to enter their email to begin the subscription.

Once they enter it, they will need to confirm their subscription from their inbox.

The confirmation message looks something like this.

And once our subscribers confirm their subscription, and we send a post, our subscribers will receive the posts via email 15 minutes after posting them. For example, I'm going the copy the text of a Lorem Ipsum text generator just for email demonstration purposes. And after a while, we will have it available both in the Fediverse and sent via email.

We finally have completed the WriteFreely installation and configuration, and now we can share our thoughts over the internet! However, it's not everything we can do with the server, taking advantage of the reverse proxy.
Additional web applications
If at some point you decide you want to make another website apart of WriteFreely, you can create another directory to point to a subdomain you can create, without the need to purchase another one. and actually, I already did a subdomain for another project I want to do. This one is less important than the one for the domain purchased for this tutorial, so for this one I can say I plan to do a dynamic guide for commands, abilities, combat styles and finish commands for Kingdom Hearts Birth by Sleep Final Mix. I'm aware there's already a similar website (very good, by the way), but it's not complete with what I want to integrate, besides lacking option to visualize the commands on different languages. For example, change freely between English, Spanish, Japanese, Italian, French and German. But I'm deviating from the topic.
I will do this process from my main server, and not from the tutorial server anymore. For it to be ready from now. My server is on a Raspberry Pi OS system (based on Debian), but I will still provide instructions for Arch.
First, I recommend creating a folder next to the main WriteFreely folder. In my case, it would be on /var/www/bbs, and place there your files for the additional site. For now, I just have the test page.
Once created the folder and placed the files, let's enable a new port and reverse proxy host for our subdomain.
For the first part, we're gonna modify the Apache configuration files to pass the traffic through more ports.
On Arch we will modify the main configuration file.
sudo nano /etc/httpd/conf/httpd.conf
On Debian, the port file.
sudo nano /etc/apache2/ports.conf
Let's sear for the line Listen 80, and just below it, we will put a new line with a new port. In my case, I used the port 8084.
Listen 80
Listen 8084
Save the file, and now let's modify the virtual host file for the reverse proxy.
On Arch:
sudo nano /etc/httpd/conf/extra/httpd-vhosts.conf
On Debian:
sudo nano /etc/apache2/sites-enabled/000-default.conf
And below the content we added before, we would put the next content:
<Directory /path/to/the/created/folder>
        Options Indexes FollowSymLinks
        AllowOverride All
        Require all granted
</Directory>

<VirtualHost *:8084>
	DocumentRoot /path/to/the/created/folder
</VirtualHost>
Once the virtual host has been created, let's restart the Apache service.
On Arch:
sudo systemctl restart httpd
On Debian:
sudo systemctl restart apache2
Now, let's go to the Cloudflare Zero Trust control panel to create the subdomain.
Once there, let's go to the Networks link on the left panel, and once there, in the middle, we're gonna see our tunnel.
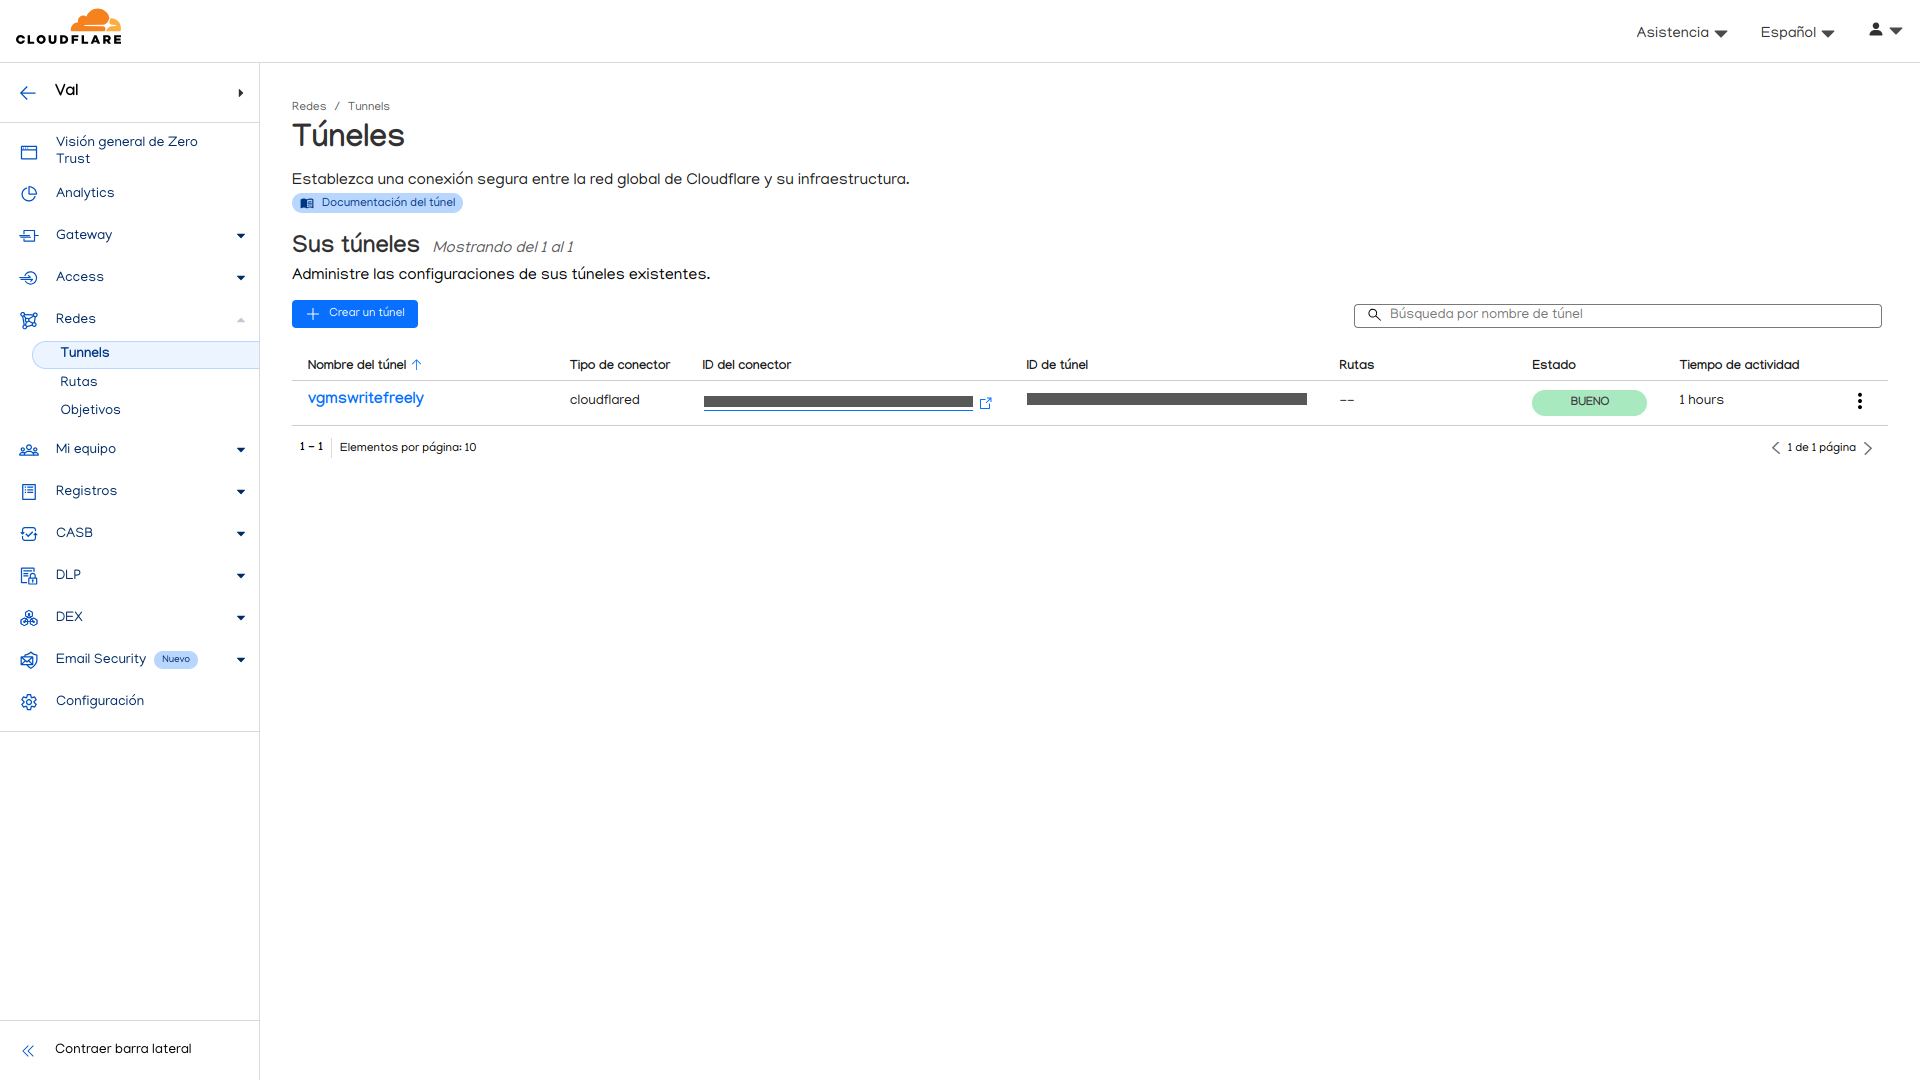
We click on our tunnel, and on the panel on the right, click on the Edit button. On this new panel, we click on the second tab, Public host name. We should be on this panel.
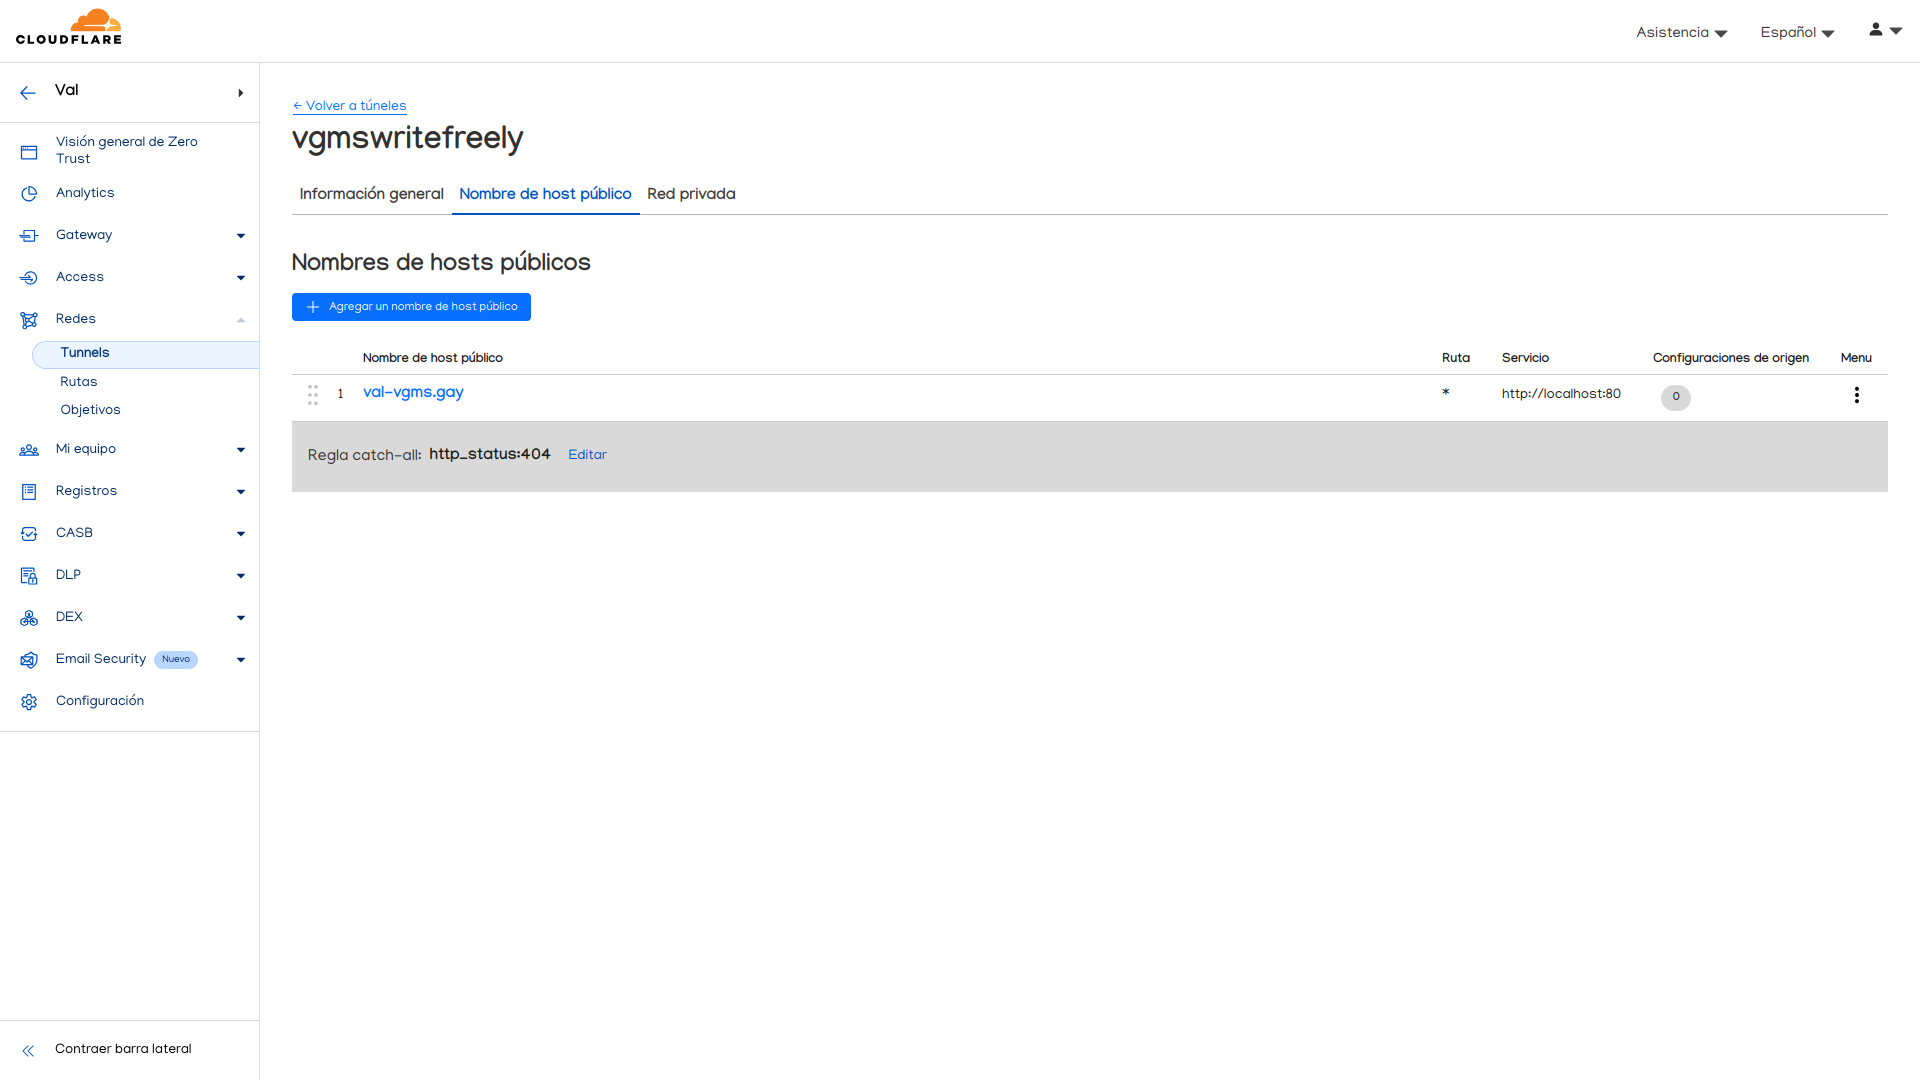
If we click on the Add a public host name button, we will advance to this screen. Which I conveniently I already filled with my subdomain data as a demonstration. It's important that on Service type, we select HTTP, and not HTTPS.
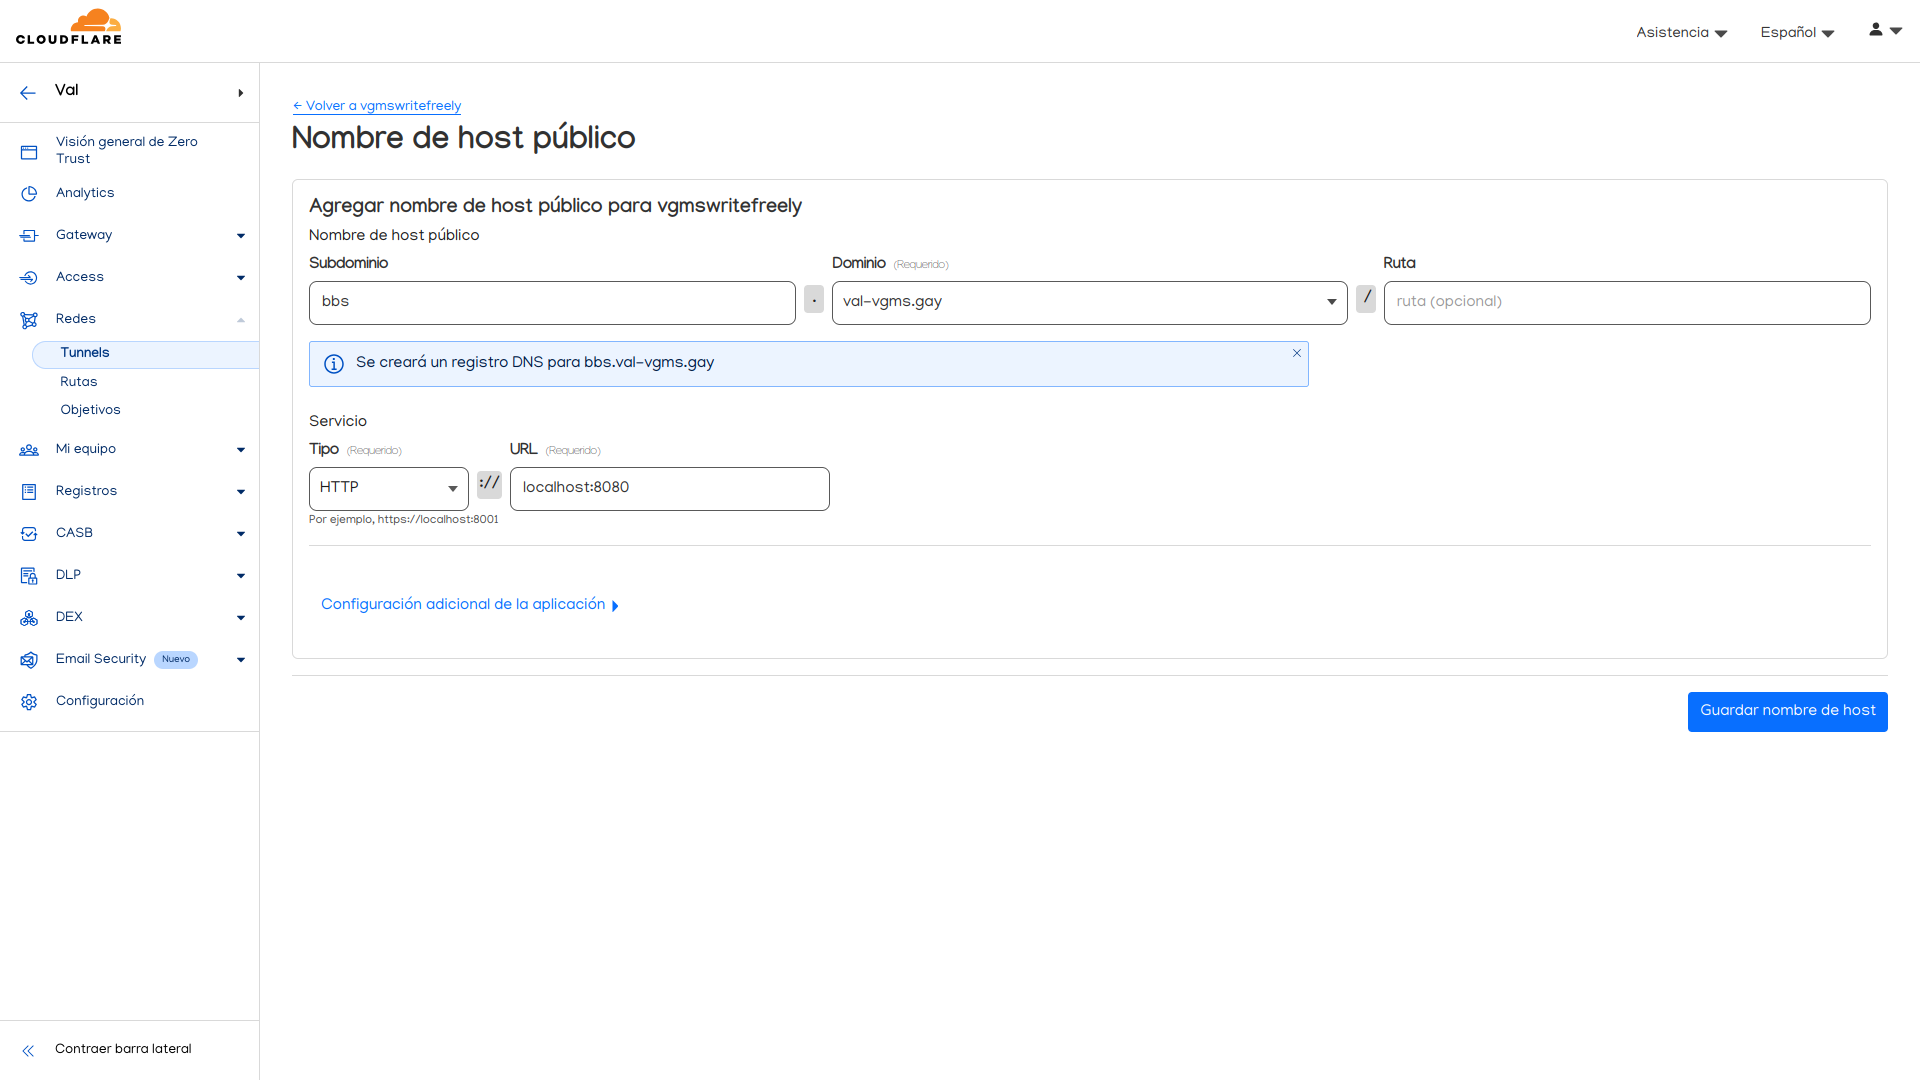
And when we click on the Save hostname button, it will appear automatically on our tunnel.
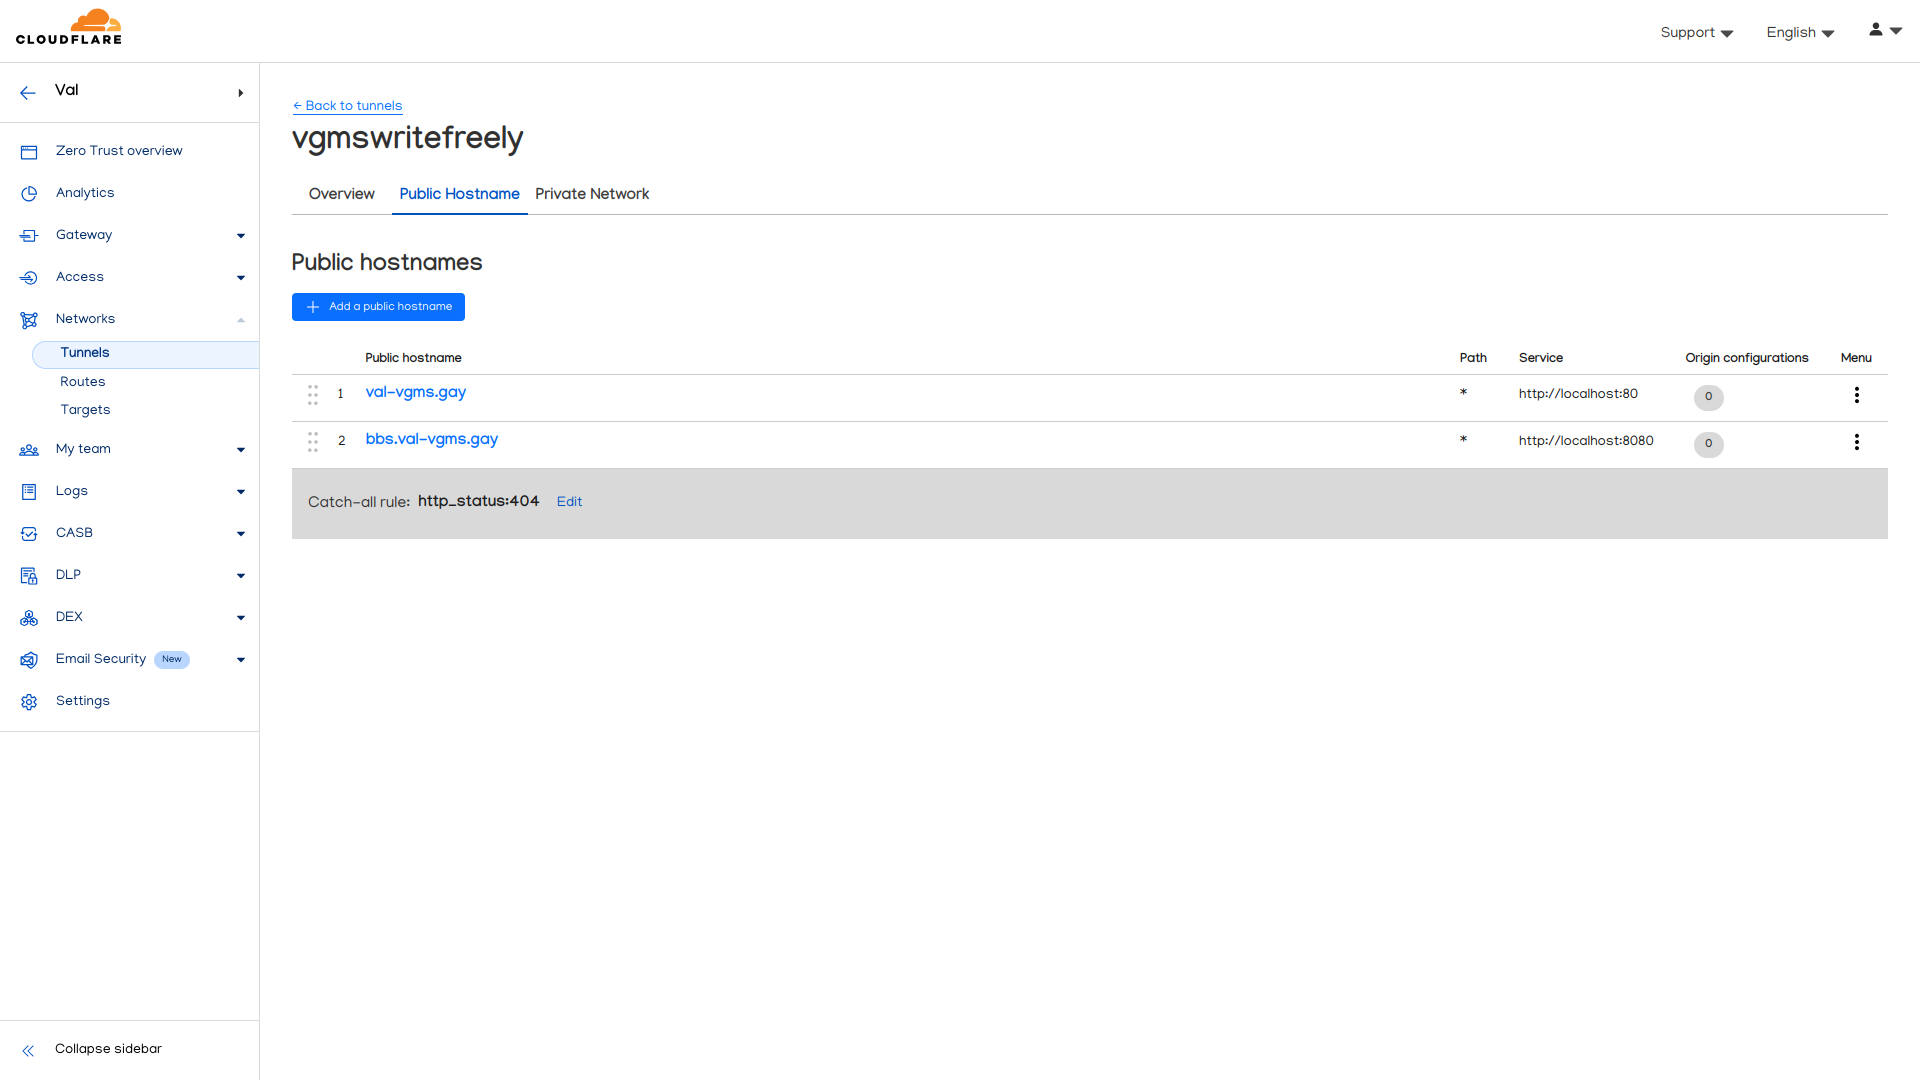
And we can also see our separate site as well.

Final notes
We have finally finished with this journey to configure our whole new server from scratch to have a WriteFreely instance to have a fully functioning blog, and potentially extend the capacities of our server to offer more services.
It was an experience on which I learned a lot, both to configure this server and even writing this tutorial. I know it's a really extended post, but I think that, by covering every point in great detail, it can help a lot of people to not have to do this process by looking separate tutorials to be able to fulfil this task. Because, let's be honest. The tutorial found in the WriteFreely official page doesn't explain a lot of things in depth, and even this post may generate a few questions.
That's why I make myself available to assist you in every way I can. Both on my Mastodon profile and via Signal messaging.
See ya on the next post!